It’s Technique Tuesday! Today we are talking about how to think opposite.
In this case take the Peaceful Poppies Stamp Set and ink the flower randomly to create a background on Whisper White Card Stock. In this case the ink used was Bermuda Bay. Instead of coloring in the poppy I colored in the background with the Dark Bermuda Bay Stampin’ Blends. To lighten up some of the streaks I used the Color Lifter.
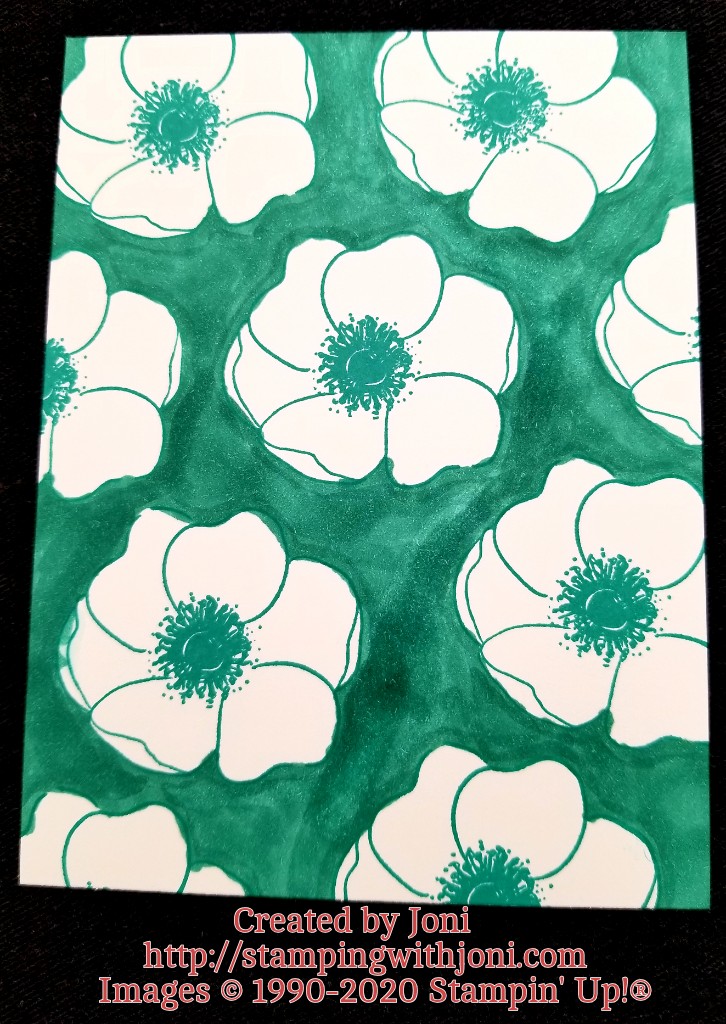
Where I missed a little on the left is probably where my sentiment or punch will go. Just remember that every mistake is a creative opportunity.
Happy Crafting!
With inky fingers,
Joni 🙂