It’s Friendship Friday! This is the day to focus on giving back or paying it forward.
I have to remind you to stay connected. I recently had a friend who called just to check in. She thought that she hadn’t heard from me for a minute so she thought she’d better see why I was quiet. It turned out I was preparing and packing to go to OnStage last week. But I am so glad she did. I got to share excitement instead of bad news (which is why I am usually quiet).
Just a reminder to share your good news as well as the bad with your friends.
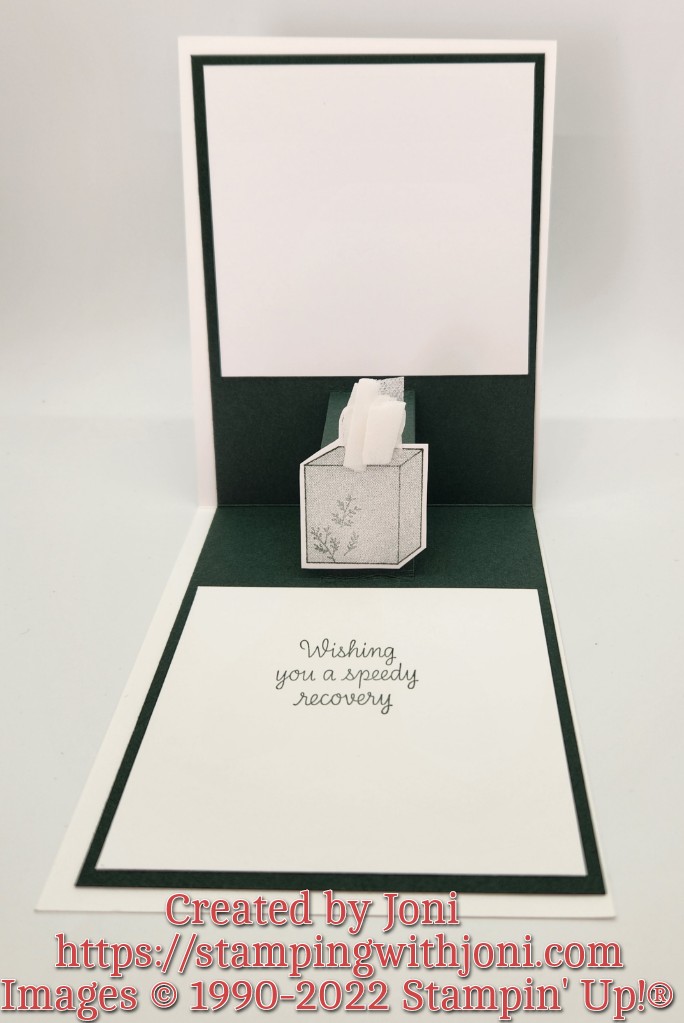
It’s Tutorial Thursday! Today I want to show you how to create a pop up card.
The pop up portion of the card is in the middle, not on the front.
For this card you will need:
Thick Basic White Card Stock cut with the Paper Trimmer to 4 ¼” X 11”. On the 11” side scored at 5 ½”. This is your card base.
Shaded Spruce Card Stock cut to 3 ¾” X 10 ½”. Notch pop ups. Tip: Use post-it note so you know where to stop for more even cuts. Attach with Stampin’ Seal on both ends only. Refer to video for more detailed directions.
Basic White Card Stock cut to 3 ½” X 3 ½”. You will need two of these. This measurement may change. You will need to measure across and down from where the notch or pop up starts to the bottom. Make sure to take off 1/2″ from both sides to get the proper mat. Stamp with greeting (sample uses Evening Evergreen Ink) for inside from the Speedy Recovery Cling Stamp Set. (To order this stamp set simply use the link https://www.stampinup.com/products/speedy-recovery-cling-stamp-set-english?hostcode=4QUEJUAS that will be good through November 30.)
Accent pieces for tissue box on pop up. Stamp in Evening Evergreen on Basic White Card Stock and then cut out with Snips. Attach to pop up with Mini Glue Dots. Then cut a tissue and attach to the tissue box with Mini Glue Dots.
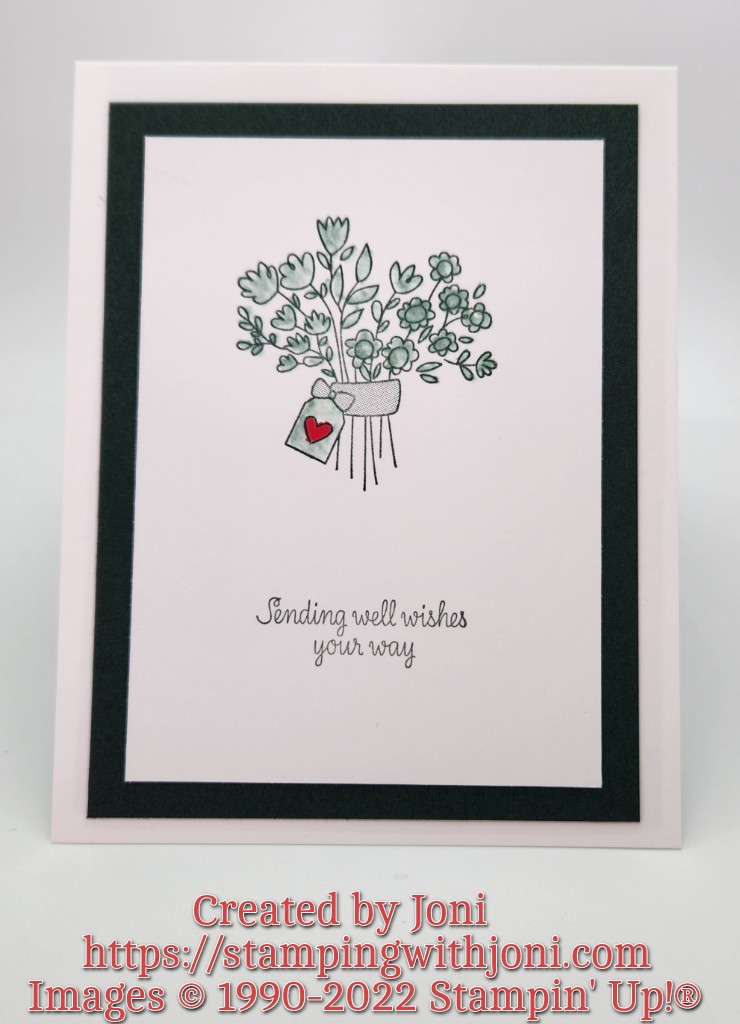
Cut the front Shaded Spruce Card Stock to 3 ¾” X 5” with the Paper Trimmer. This is the outer mat on the front of the card. Attach with Stampin’ Seal.
Cut the Basic White Card Stock to 3 ¼” X 4 ½” with the Paper Trimmer. Stamp the flowers and words in Evening Evergreen Ink. Then use a Blender Pen to color the flowers and leaves. The heart is colored with the Dark Sweet Sorbet Stampin’ Blends. Then attach to outer mat with Stampin’ Seal.
To see the other card as well as to get full instructions please go to the video at https://youtu.be/UzZionzaMQ0.
It’s Wacky Wednesday where a product is used in a way it is not intended!
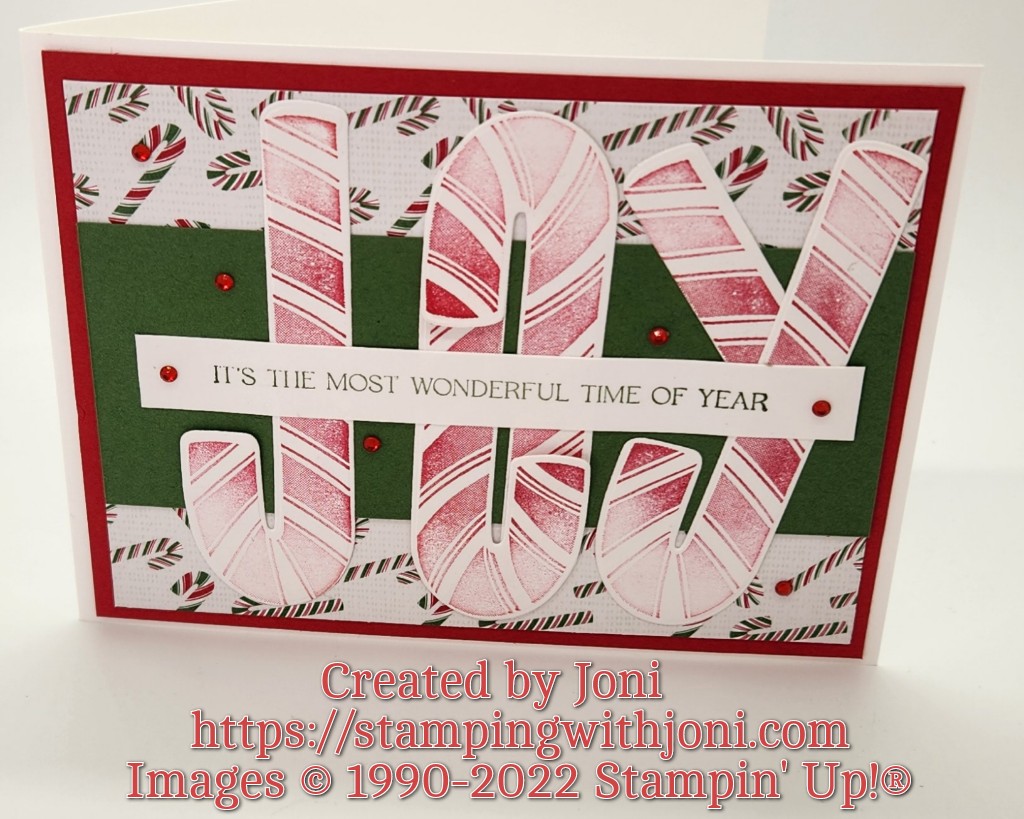
Do you remember me saying to look at your products sideways and upside down as well as the correct way? I hope so. Well today we are looking at the Sweet Candy Canes Bundle to make letters. If you would like to order this bundle please use the link https://www.stampinup.com/products/sweet-candy-canes-bundle-english?hostcode=4QUEJUAS. (This will also qualify you for the Club Order Bonus.)
The candy canes need to be stamped and then cut out. Make sure to pay attention to the direction the curve or crook of the cane is going. They can then be used to form the word “joy” in this case.
What other words can you see?
If you would like to make this card and two others then plan on coming out on Saturday. Today’s the last day to reserve your seat.
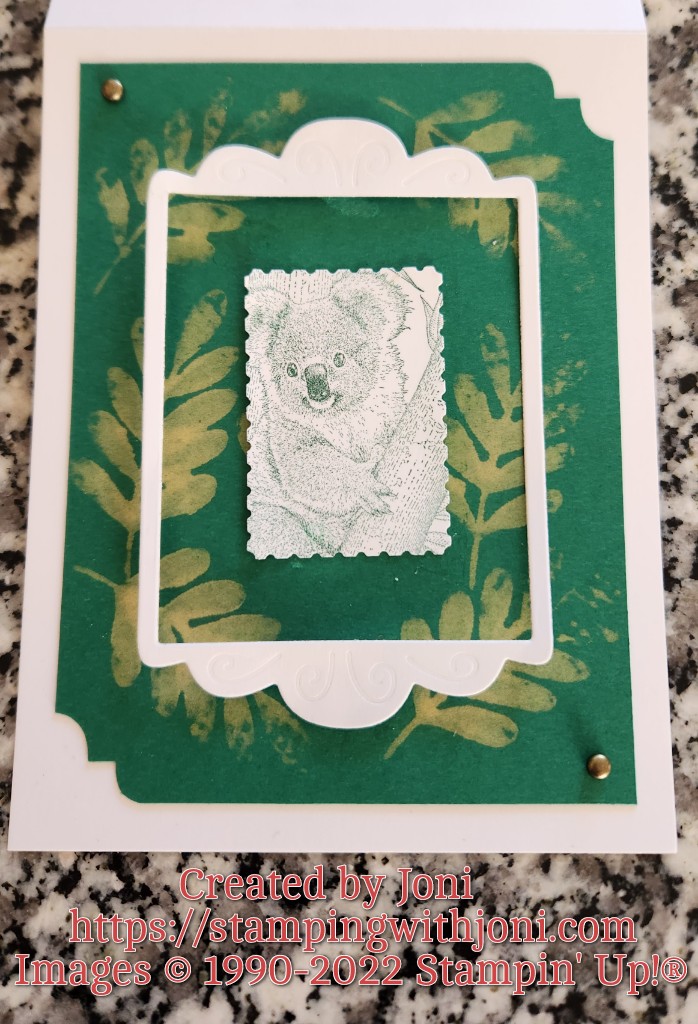
It’s Technique Tuesday! Today I want to bring back an oldie…bleaching.
Our card stock with Stampin’ Up! is dyed all the way through so it makes it interesting when bleaching it.
To do this project you will need:
a paper plate
paper towel (preferably with no print or ink on it)
a splash of bleach
stamp
colored card stock
For this specific card I took Shaded Spruce Card Stock and stamped leaves on it to resemble eucalyptus leaves to go with the koala. The ink I used was bleach.
To prepare the “ink pad” I took a paper plate and a paper towel. I folded the paper towel until the entire thing fit inside the edges of the plate. I then poured bleach on the towel until it was just more than damp. Then you take your stamp and “ink” it with the bleach. The towel on the plate is a modified ink pad.
After stamping make sure you set your card stock aside and allow it to dry for about 15 minutes. As it dries you will see the colors come out from the core of the card stock. For instance, Shaded Spruce has somewhat of a yellow undertone. So, as you can see, the stamped images became lighter with a slightly yellow tone.
When your card stock is dry, decorate and use just like you would a stamped mat.
Have you created with this technique before? When you do create a project with this technique please post your photo on my page so others can get ideas too. My page is at https://facebook.com/StampingWithJoni.
It’s Management Monday! Here’s what’s happening this week and maybe a bit beyond.
Christmas Card Buffet
Just a quick reminder that the Christmas Card Buffet is coming up on Saturday! You will make 6 cards and have lunch for $35 ($25 if Team). Reserve your seat by Wednesday!
Open Day Session
Come on out to finish your Christmas cards, stop by and say hello, ask questions, or pick up an order. If you’ve been wanting something online and don’t want to pay the shipping this is when you can pick up too. Please, if there is preparation or you want something pulled for you, let me know ahead of time. Otherwise there is no need to RSVP.
December Online Craft Class
Club Order Bonus
This is through tomorrow! So don’t wait if you want the new swirls!
For this Club from November 1-15 order $50 or more in product with host code 3JSJVY4R or using the link https://www.stampinup.com?hostcode=3JSJVY4R to qualify. (You can also place your order directly with me but it will not be submitted until November 16.) There is no commitment unlike past Clubs. There is simply a bonus. To read more details about Club please go to https://stampingwithjoni.wordpress.com/cluborderbonus.
Online Shopping
My retired stamp sets are now available online! There is not an option for local pick up except during the Open Day Session.
I will also no longer be doing the BOGO sale in May. All sets will be online from now on.
Host Availability
Are you missing in-person classes? Well, now you can choose everything. When you choose to be a host you get to pick exactly what you want: your location, your food, your projects, and your free products.
So let me know where I am going and when. I look forward to what ideas you have to share with me!
It’s Sabbath Sunday! This is the day to rest so you can be recharged.
Have you ever been busy but felt rested too? Here’s what I mean by this statement.
Before the pandemic I found myself complaining about being busy. It seemed from October through December was just constant with no end in sight. I was constantly reminding myself of how tired I was.
Then 2020 hit like a meteor and nothing happened. And by nothing, I mean nothing. There were no fairs, no people, no nothing. Well…you know, right?
As we finally began peaking out from behind our front doors I realized that life isn’t much of anything without people to enjoy it with.
So this year I have found myself not complaining. Instead I am putting in the work to be able to see people and connect.
Have you found yourself treating connections differently this year?
It’s Friendship Friday! This is the day to focus on giving back or paying it forward.
When you decide to eat with someone it’s amazing how much better you get to know someone. You learn what they like and what they don’t. You learn if their food can touch or if everything is just stirred together. You learn if they eat fast or if they eat slower than the tortoise outside.
My point is this…when invited to eat with someone you learn more about a person than just sitting to talk with them.
So the next time someone asks you out to lunch, dinner, whatever…go. If you want to get to know that person better then go.
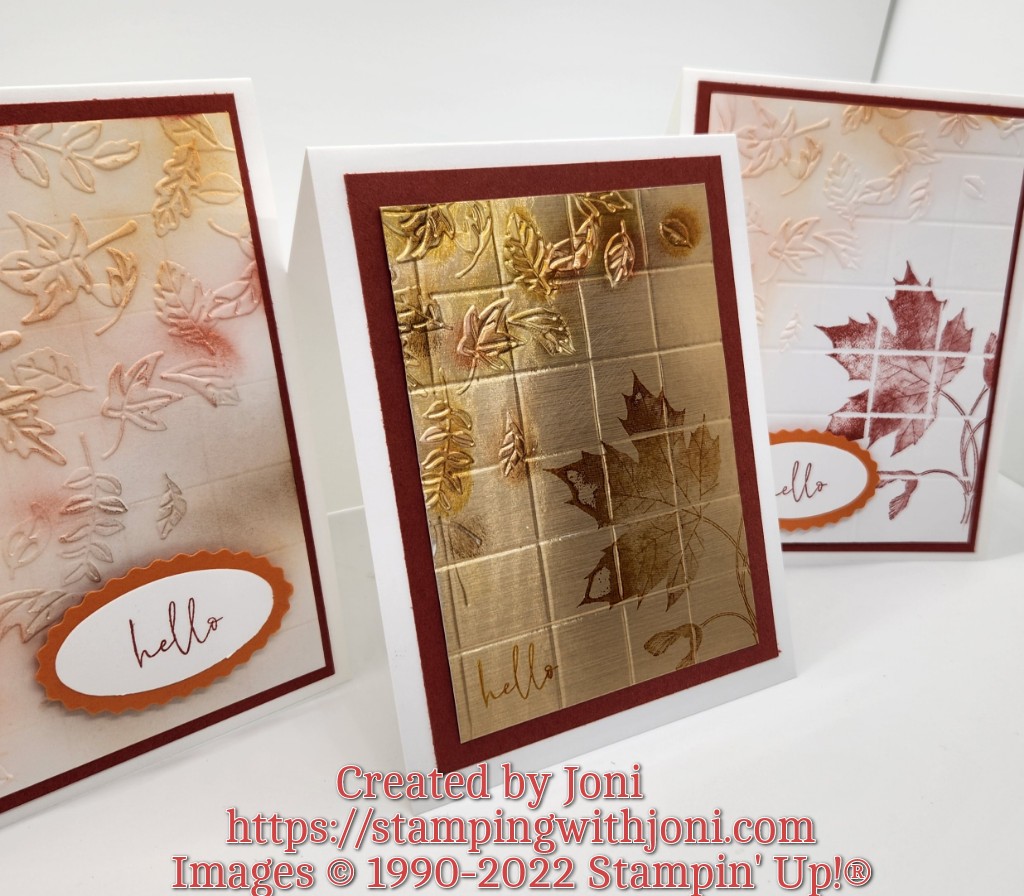
It’s Tutorial Thursday! Today I want to show you how to tile and wood burn without grout or any kind of heat tool.
For this project you will need:
Card base of Thick Basic White Card Stock cut to 4 1/4″ X 11″. On the 11″ side score at 5 1/2″.
Cut the Cajun Craze Card Stock to 5 1/4″ X 4″. This is your outer mat that you attach to the card base with Stampin’ Seal.
Cut the Basic White Card Stock (not thick) to 5″ X 3 3/4″. This will eventually be attached to the outer mat but not just yet. This is your inner mat.
Run this piece through the Stampin’ Cut & Emboss Machine with the Leaf Fall 3D Embossing Folder. Make sure there is quite a bit of space left on the card front.
Then take this piece and place on the Simply Scored Scoring Tool. Take the stylus and score evenly to create a tiled look. For the sample I spaced the “tiles” every 3/4″.
Now I stamped the large leaf from Soft Seedlings Cling Stamp Set.
I then used the Blending Brush with Pumpkin Pie and then Cajun Craze Inks.
Last, but not least, to get the wood burned look I took a Sponge Dauber to fill in some of the edges and lines (grout) with Early Espresso.
Tip: Try coloring on the concave side to have it look more wood burned.