Wreath Card Tutorial

All right…drum roll please…here is the tutorial you have been waiting for.  It will be long but it will be worth it.  At the end of it all you will be able to create a wreath card with a single stamp and a sentiment.  Are you ready?  Let’s go!

  • Cut a piece of Thick Very Vanilla Cardstock in half (5 1/2 x 8 1/2″) and score at 4 1/4″.  This is your card base.
  • Cut a piece of Old Olive Cardstock to measure 5 x 3 3/4″.
  • Cut a piece of Merry Merlot Cardstock to measure 4 1/2 x 3 1/4″.
  • Cut a piece of Very Vanilla Cardstock to measure 6 x 6″.
  • The Old Olive and Merry Merlot pieces are your mats.  You can glue to your card base now if you like.


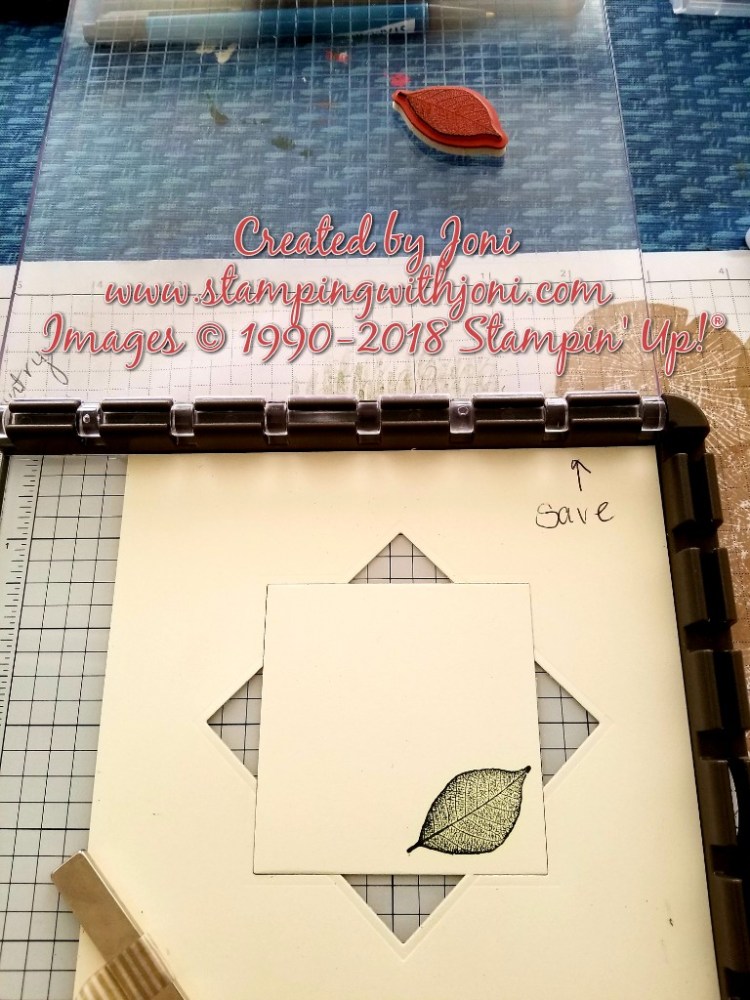
  • Take your 6 x 6 piece and the largest square die from the Layering Squares Framelits.
  • Cut out a square in the middle and then a diamond.
  • Now place your square inside the template (after writing save and an arrow up) on the base of the Stamparatus.
  • Place your stamp on the square where you want it to stamp.  Press the hinged, clear plate on to the stamp to pull off the page.  Ink your stamp with Old Olive and stamp.20180710_074941_wm - Copy
  • Rotate your square either counter-clockwise or clockwise.  Whichever way you decide you need to be consistent with.20180710_075040_wm
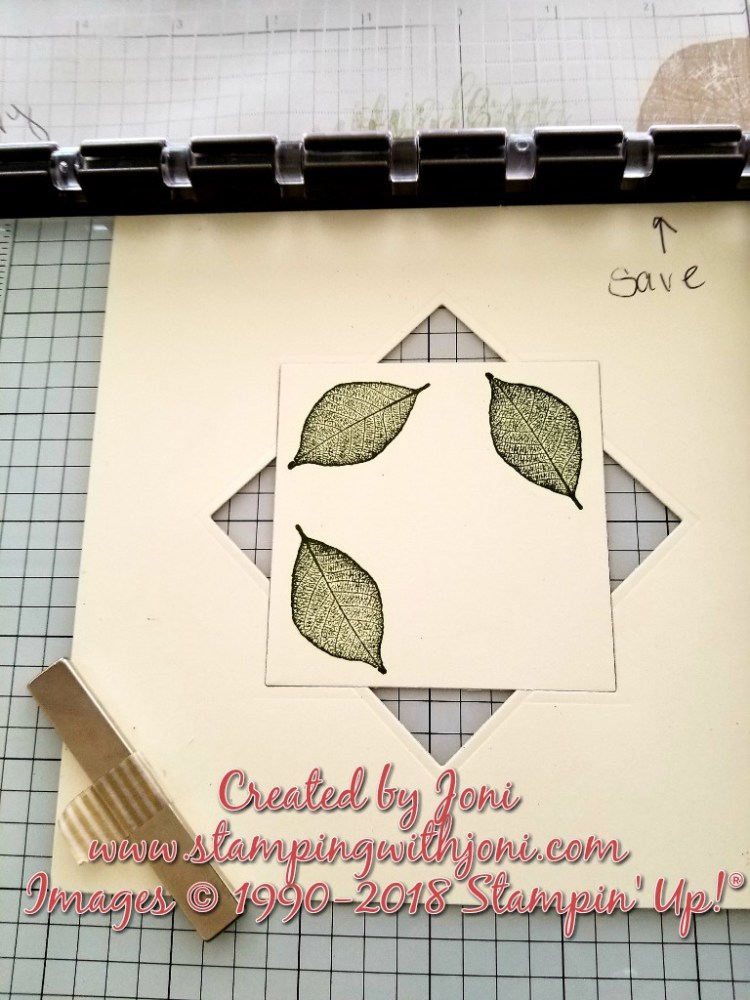
  • Now place in the diamond template and rotate until all is filled.
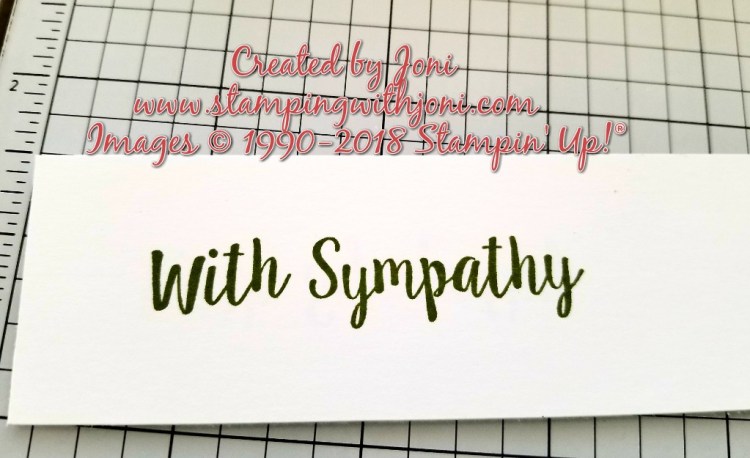
  •  Take your sentiment and stamp in Merry Merlot with the Stamparatus.
  •  Place embellishments accordingly.  The faceted gems were used here.

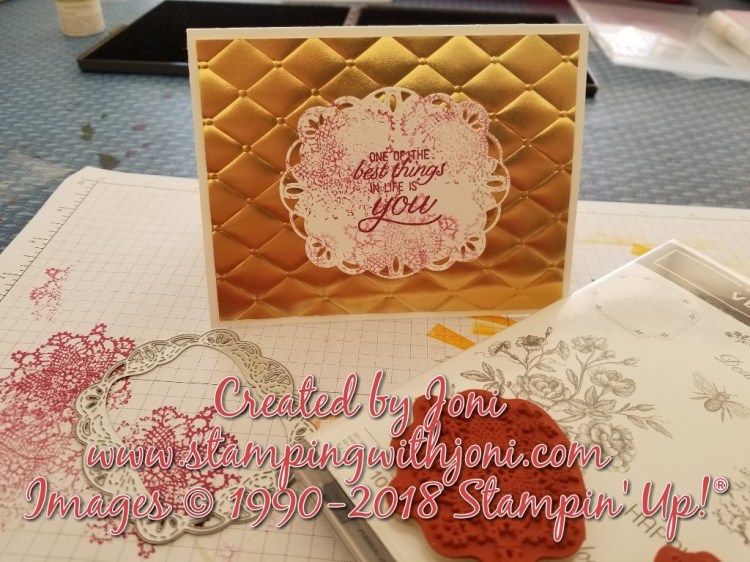
    Here is the finished card.  Enjoy!20180710_075317_wm

If you prefer the video here is the link…Wreath Card Video

Happy Crafting!

With inky fingers,

Joni 🙂

Stamparatus fixes everything.

Well, that title might be a little over zealous but it does fix some stamping errors.  If you generally get the halos then this gives you permission to stamp lighter.  There is no fear of something not inking properly and not being able to go back.  With the Stamparatus you can always go back.

In this instance I didn’t use equal pressure and didn’t get the left side of the stamp inked the same as the right.

20180711_073542_wm.jpg

And usually this would be the end of the story.  It’s time for a do over.  Toss it, flip it, and re-stamp.  But not this time.  I simply re-inked my stamp and pressed it again.  This time I made sure to press the left side.  Here is the result.

20180711_073627_wm.jpg

If you would like to order a Stamparatus please contact me or use host code J92PTFKA to help Jodi earn FREE products!

Tune in tonight at 7 pm on Facebook Live to see how to create a wreath with a single stamp and this great tool.

Happy Crafting!

With inky fingers,

Joni 🙂

Using the Stamparatus to create a wreath.

Today’s technique is a tiny bit different.  I am using the Stamparatus to create a wreath, the ultimate in positioning.  Here’s how to do it in pictures and then explanation.

  1. Create a template using a 6×6 piece of cardstock.  Take the largest plain square from the Layering Squares Dies and cut a square from the middle.  Then place the square at a diagonal to create a diamond.
  2. Take your square that was cut out to become your accent piece.
  3. Place in square, not diamond.
  4. Stamp whatever you choose to create your wreath.
  5. Rotate the same direction each time.
  6. Stamp again.  Repeat on all 4 sides.
  7. Then begin on the diamond side.
  8. Rotate and stamp on all 4 sides of the diamond.
  9. You have a wreath or circle of whatever stamp you choose.

For the complete tutorial tune in on Thursday.  For the video tune in to the Live on Wednesday evening at 7 pm.

Happy Crafting!

With inky fingers,

Joni 🙂

P.S.  Credit goes to DOStamping for the original idea.

So many choices…

There is quite a bit going on this week…

The 4th of July finishes tonight!  If you want a break on your taxes then take a look.

1530719585113

Christmas in July is happening on Saturday!  The invitation will be out by tomorrow morning!

Card Class is happening next week!  Invitation soon to follow.

Save the date for the 12th Anniversary Party on Saturday, July 28.

Happy Crafting!

With inky fingers,

Joni 🙂

Space for rest.

Have you ever googled or searched for rest?  I typed in the word “rest” and up comes many images.  There are the traditional beach scenes, hammocks with a gentle breeze, lists on why rest is good for you, and much, much more.

The one that caught my eye is the traditional rest stop sign.  This reminds me to make sure there is an area of my life that is blocked off for rest.  If I don’t give myself permission to rest, I won’t.  Make sure to have a designated exit for rest.  If you don’t take it the next rest stop may not be for 287 miles.

What is your area for rest?  Is it a certain spot in the house?  Is it your craft room?  Is it the kitchen and cooking your favorite meal?  How do you set aside time or space to rest?

Happy Crafting!

With inky fingers,

Joni 🙂

4th of July Promotion, Free Ink Pads, and Host Codes!

Just a reminder that the 4th of July promotion through me runs until Monday night at 9 pm.

1530719585113

Please remember to use the host code to get your sales tax refunded by me.

If you haven’t heard there is a great bonus if you sign up to be a demonstrator right now.  The kit is $99 with tax but no shipping.  This is not the great part.  You get $125 worth of product for that $99.  This is not the great part either.  Here’s the bonus…you get to pick one color family or stack of ink pads for FREE!  The only requirement is that you have to buy $300 per quarter.  You get a 20% discount guaranteed.  There is no negative impact on your credit if you quit.  You don’t have to teach.  You don’t have to do anything except sell or purchase $300 per quarter.  That’s it.  There are really no negatives with Stampin’ Up!  Let me know if you would like to meet and ask me more questions.  Here’s the flyer for this promotion.

07.01.2018_SHAREABLE2_INK_PAD_US.jpg

There is also a paper promotion going on right now.

07.01.18_SHAREABLE_DSP_SALE_ENG.jpg

Contact me for the list of which papers are on this great promotion.

I hope this is enough to keep you going.  Please contact me with any questions you might have.

Happy Crafting!

With inky fingers,

Joni 🙂

Mentorship is a huge way to give back.

Have you ever seen someone that is trying so hard but just can’t seem to get it?  Ask yourself if the time is right to mentor someone.

I asked someone “why mentor”?  And their answer was remarkable, yet simple.  “To shape the future.”

If I don’t like how the next generation is thinking, working, whatever maybe it’s my turn to help.  If you don’t teach the next one then I will be doing that job forever.  It won’t be done the “right” way.  Whatever the reason is, we are here to help each other.

I got a good taste of this help from a dear friend of mine this week.  He agreed to take my daughter under his wing for her first job.  He has been training her and showing her the ropes as some would say.  It’s been amazing to see the difference in her.  I just hope it has been beneficial for him too.  Time will tell as it is said.

I have amazing, dynamic, hard-working friends.  I am hoping I live up to this as well.  Remember friendship is a two-way street.  To attract amazing people you have to aspire to be one yourself.

I am humbled by what people are willing to give.  What will you give to create impact today?

Happy Crafting!

With inky fingers,

Joni 🙂

Tufted Card Tutorial

Here are the directions for the tufted card that was created this week.

  1. Cut a piece of thick white cardstock at 4 1/4″ x 11″.  Score at 5 1/2″ on the 11″ side.
  2. Cut a piece of gold foil paper at 4″ x 5 1/4″.
  3. Grab a piece of whisper white cardstock from the scrap pile.
  4. Take the gold foil paper and run through the Big Shot with the Tufted Embossing Folder.  Make sure to line up the paper with the line on the folder.  The front of the folder is where the words “Sizzix” are.
  5. Stamp the scrap piece of cardstock with Berry Burst.  The lace background is stamped off once to create a lighter color.  All stamps are from the host set called Very Vintage.  (If you would like this set please contact me to host.)
  6. Run the white scrap through the Big Shot with the label die from the Stitched Labels Framelits dies.  These coordinate with the Very Vintage stamp set.
  7. Use snail adhesive to attach the gold foil to the white base.  Use dimensionals to attach the sentiment to the gold foil.20180702_123543_wm.jpg

Happy Crafting!

With inky fingers,

Joni 🙂

A little off the beaten path.

You know that I usually don’t follow the path that is usual.  I often will find adventure in the everyday routine.  So today I figured we could not do our Wacky Wednesday and simply talk about freedom.  I know it’s cliché since it is the 4th of July, but often times what is expected is the last thing you will find.

The definition of freedom is…

1the quality or state of being free: such as

a the absence of necessity, coercion, or constraint in choice or action

b liberation from slavery or restraint or from the power of another independence
c the quality or state of being exempt or released usually from something onerous 

  • freedom from care
d unrestricted use 

  • gave him the freedom of their home
e easefacility 

  • spoke the language with freedom
f the quality of being frank, open, or outspoken 

  • answered with freedom
g improper familiarity
h boldness of conception or execution
2a a political right
I find the definition of freedom from care to be most meaningful to me at the moment.  To me this means freedom from worry or thought of being judged.  After living overseas I find this to be very true.  When I lived in Italy I was constantly thinking of how I was dressed and how people would see me.  Now don’t take this the wrong way.  I was not worried of what people thought.  I was worried that if I looked too “American” I could get robbed easier or taken advantage of.  I did not want to stick out.  I find it very freeing to finally be back in southern California where I fit culturally and not have to worrry about sticking out.  If I do that is fine because I know it is home.
Freedom can mean many things to many people.  What does it mean to you?
Happy Crafting!
With inky fingers,
Joni 🙂

4th of July Promotion Runs Through Monday at 9 pm!

1530719585113.jpg