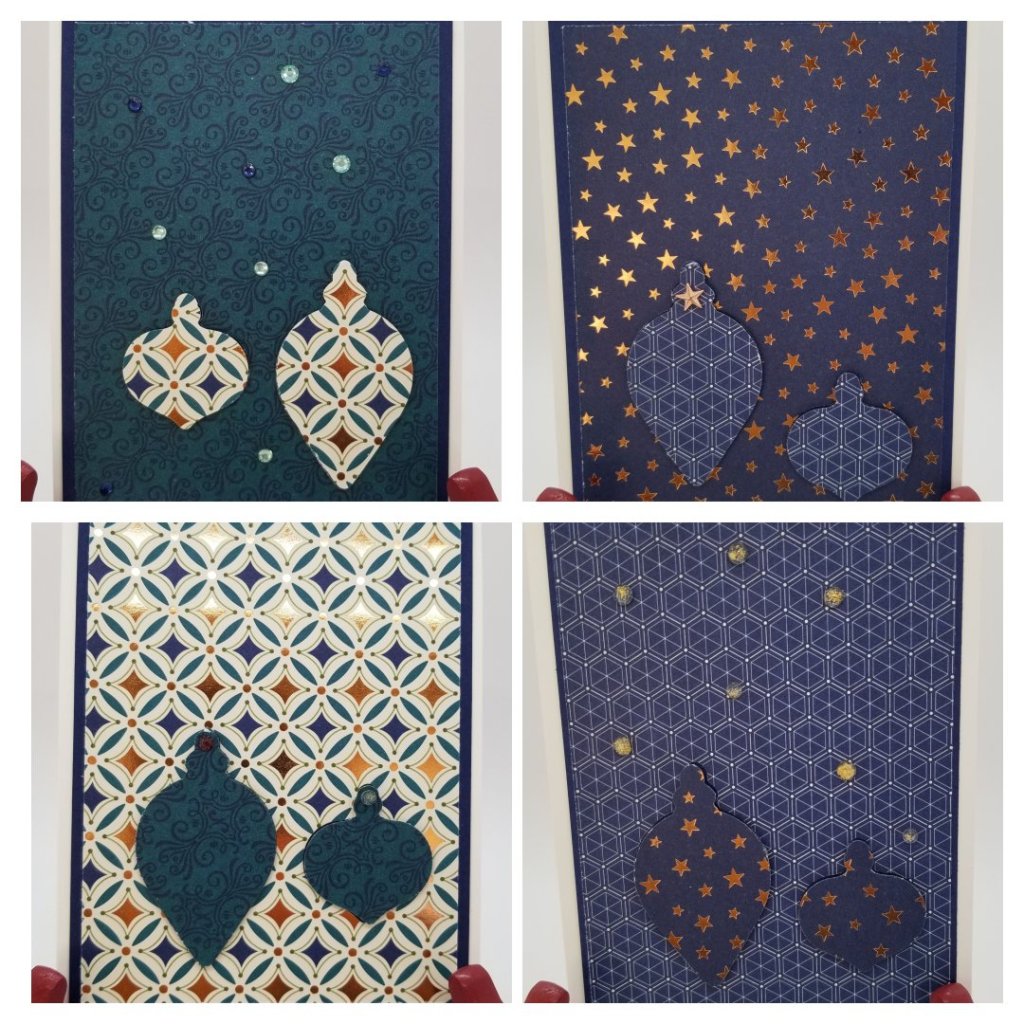
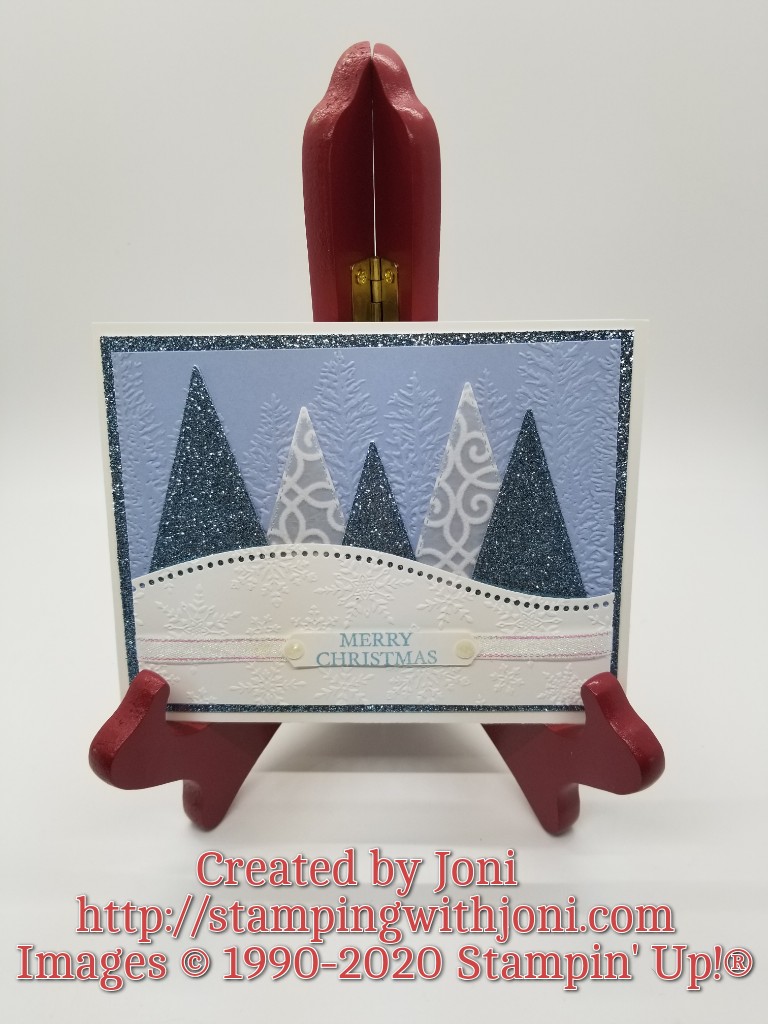
It’s Tutorial Thursday! Today I want to show you how to create four cards in less than 20 minutes using negative space to create depth, texture, and a positive. Watch as I create Christmas cards for you that are quick and easy.
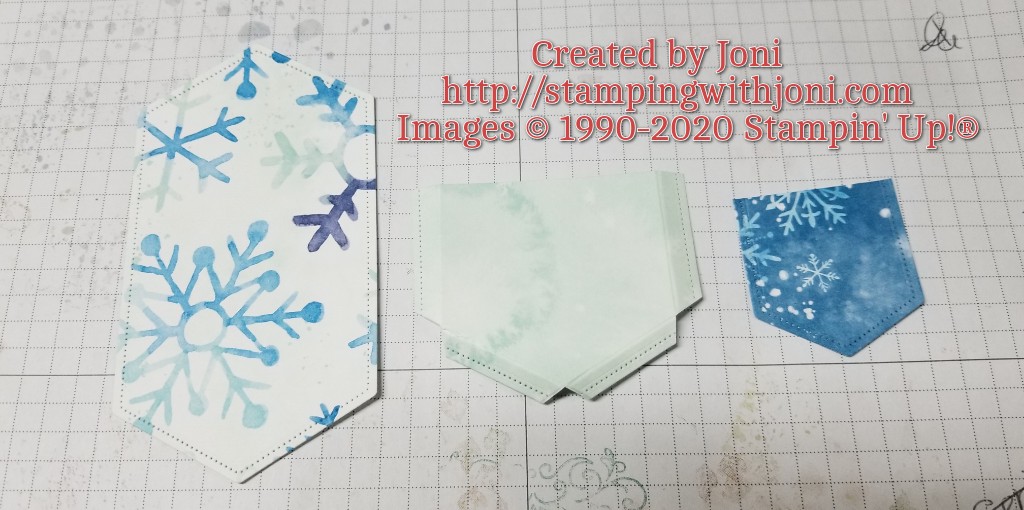
It’s Wacky Wednesday where a product is used in a way it is not intended!
Today I am going to show you how to tuck something so it breaks up the pattern.
You cut out anything lacy, stitched, or embroidered and then create a pennant to go through it. This allows the pattern to be broken up and for it to not be overwhelming.
If you try this please post your photo of your creation in the comments.
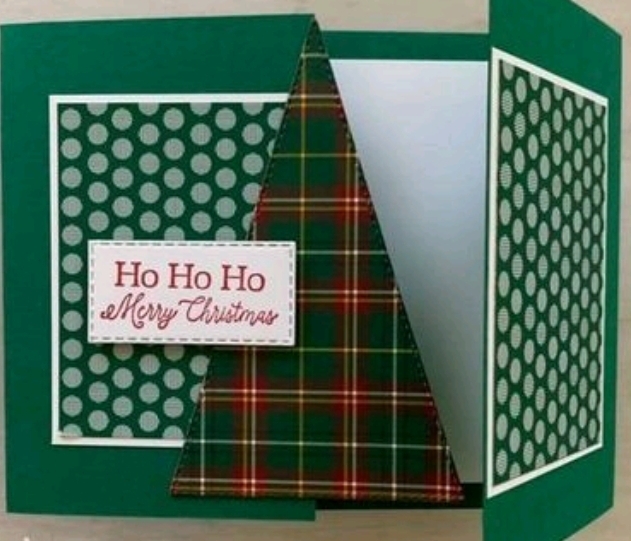
It’s Technique Tuesday! Last week I used the Stitched Triangles Dies to create a Christmas card. Well, this week I am at it again using a similar technique to create a similar result.
You just need awesome paper and some simple shapes to get done with your creation. Please, if you create using this technique, post your photo of your creation in the comments.
It’s Management Monday! Here’s what’s happening this week.
Open Day is happening! Let me know that you are coming so I can make sure there is a seat for you!
Just a reminder that the Year-End Closeout Sale begins tomorrow! If you would like to order online please use the link https://www.stampinup.com?hostcode=FHTCPDFK. Many of the items are while supplies last so don’t wait! If you prefer these lists emailed to you so you can sort or enlarge please email me at reddoor@stampingwithjoni.com with “closeout list request” as the subject line.
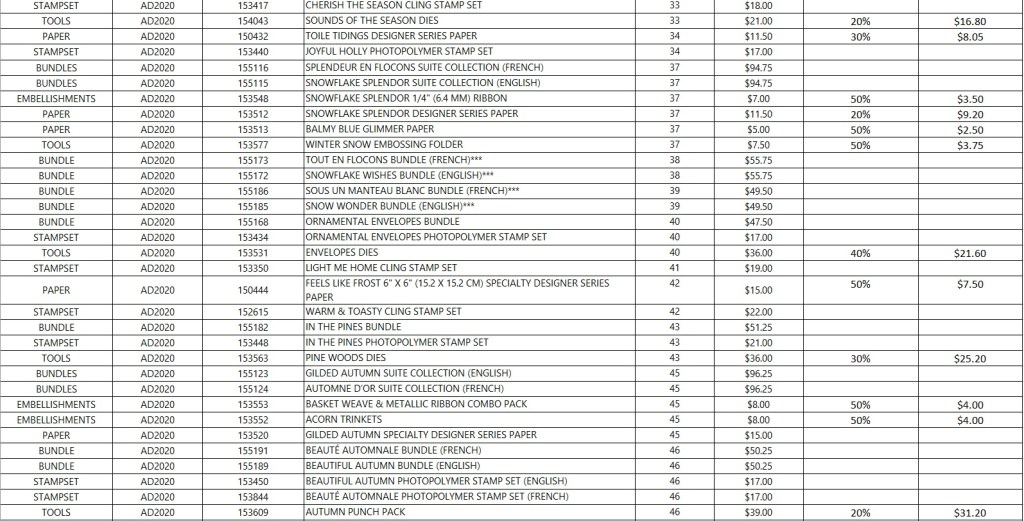
Here is the list of what is retiring (and possibly discounted).
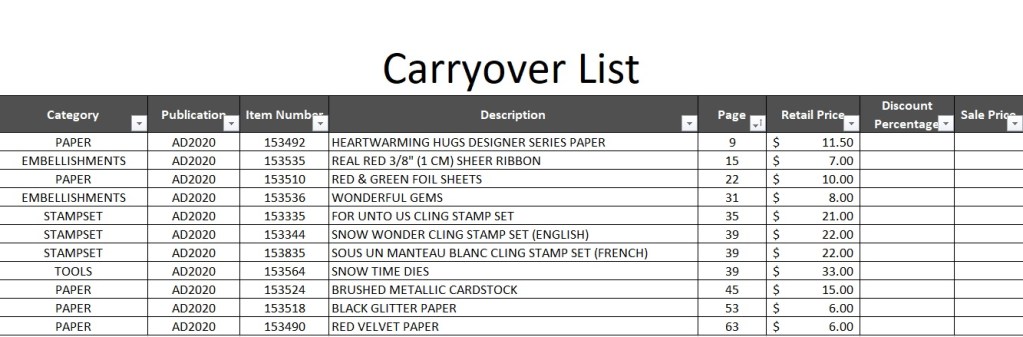
And here is what is carrying over.
The invitation for Card Class is out! Let me know which session you will be attending. If you can’t make a session you can order a kit by Wednesday and come any Monday during Open Day. Or you can order the cards finished as a custom order.
The invitation for the Christmas party is out! It will be run a little differently this year so let me know when you would like to come. Here is the invitation.
Come on out on Saturday, December 19 from 10-4 to enjoy a Christmas party! There will be raffles, projects, Christmas cookies, the new catalogs, and (of course) Christmas presents. As always all in attendance need to be Crafters, over the age of 16 years old, and will have no mess to clean up. This is not a true Open House style as I will need you to reserve your hour and a half block that you will attend. Each block will have no more than four in attendance at a time.
Below are the block times to choose from: 10:00 am – 11:30 am 12:00 pm (noon) – 1:30 pm 2:00 pm – 3:30 pm
You can reply to this event, the Facebook one, message, text, email, or call to reserve your time block. If you miss your time block please contact me to schedule another time. Thanks for being flexible this year! See you on Saturday!
It’s Sabbath Sunday! This is the day to focus on rest and recharging for the week.
Sometimes we get over zealous and have to remember our humanness. Let me explain with a story.
I had turned 45 years old last year and was feeling my age. I know I needed to start moving again, but simply found it easier to sit and wish. I had always gone to the gym but life just seemed to be catching up to me. So I decided to push it a little. I decided that walking wasn’t enough so let’s start running.
I woke up in the morning, put my workout gear on, and was off to the races…at least so I thought. I’ve been told that half of the game is in your head. So I was ready. I was going to do it. I walked outside and set my app (couch to 5k) and turned my music on. What could go wrong? I was ready.
The warm-up went well. And then it began. The torture. How could 90 seconds be such a long time? Obviously the stopwatch wasn’t working. Something had to be wrong. The thought came in to my mind that if I would just roll my ankle all of this could be over. But no, I continued.
And I found out that day that I could run about 3 minutes. That’s it. So I was determined to keep going. After about 3 months of training (some might call it torture) I was able to run over 2 miles and for over 20 minutes.
And what did I learn from all of this…that I could do it!
I also learned that if it takes you more than 2 days to recover it just may not be the right exercise for your body. So, I will continue to workout but running is a goal that I have checked off the list.
All of this is here to say that while resting is a good thing, if it takes you more time to recover (and you can’t hardly walk) than it’s worth than the activity might be what’s wrong and not the rest. Remember that if you are not in the right place at the right time doing the right thing for you, you might need to re-evaluate.
It’s Sale Saturday! Just when we thought it was slowing down we are back at it. We had Black Friday promotions a few times and now the Giant Year-End Closeout is coming! It starts Tuesday the 8th and runs through January 4.
Here is what is retiring from the Holiday Mini Catalog! Please be aware that some items are discounted as much as 50% off. All are while supplies last!
And here is what is being carried over and not retiring.
If you prefer these lists in an excel format so you can rearrange it by category, page number, etc. please contact me as I can resend these lists re-formatted.
It’s Friendship Friday! This is the day to focus on giving back or paying it forward.
Have you ever had such a good friend that you could be completely comfortable being silent? Most of the time you want to fill that awkward silence with gasps of desperate conversation. But, being with a true friend, is in essence finding your true self. Finally finding someone that can love you where you are.
I have often heard a true friend explained as someone that can look at my lump of coal and see my future diamond.
It’s Wacky Wednesday where a product is used in a way it is not intended!
Have you ever used a label for a pocket? Well, right now that is what is happening.
I have taken three sizes of the Stitched Nested Labels Dies (https://www.stampinup.com/products/stitched-nested-labels-dies?demoid=2008407) and cut them out. Two of the labels I have cut in half with the Paper Trimmer and attached with Stampin’ Seal +. The label in the middle is actually larger than the one on the left. This was so I could score each of the three sides and notch the tabs so it folds correctly.
After it is folded and tucked then it becomes any type of holder. In this case it was for a pen. But, with the holidays coming up, it could be used for a gift card holder or even silverware for a place setting. It is up to your imagination.