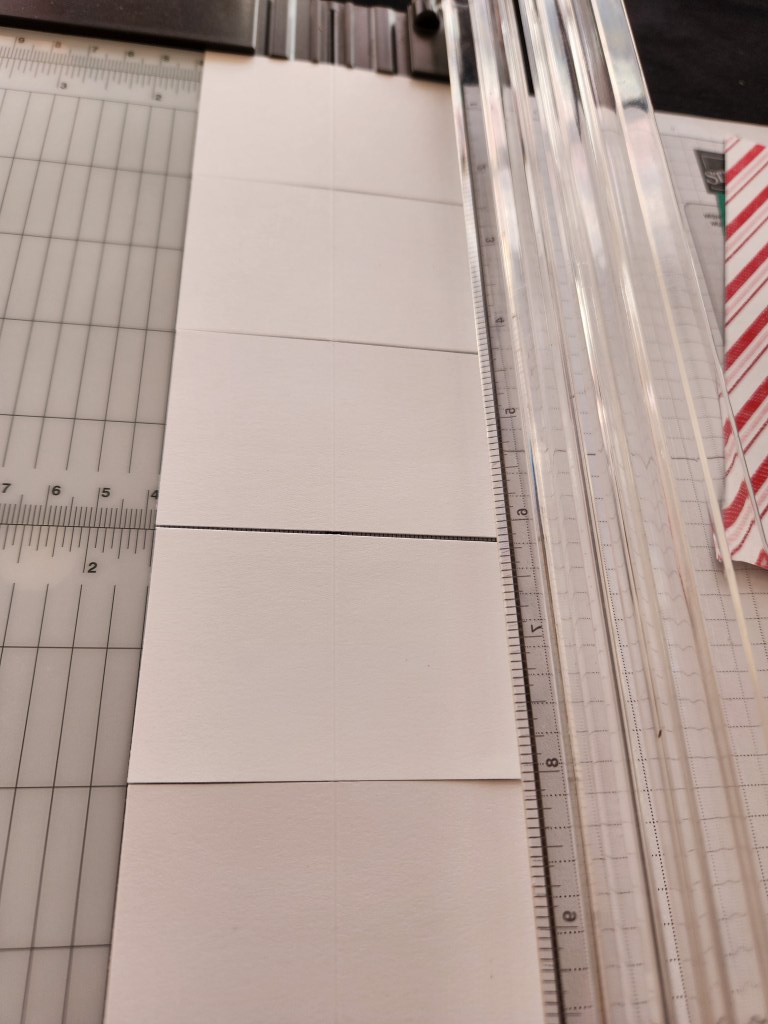
It’s Technique Tuesday! Today is more of a tip than a technique.
When you are doing multiple projects remember that you can stack your card stock. Instead of only scoring one piece at a time do as many as will fit in the Paper Trimmer. Make sure to use the lines going down to ensure that your pieces are all straight.
When you can be efficient so you have more time to design and create.
It’s Management Monday! Here’s what’s happening this week and maybe a bit beyond.
Team Gathering
The Team Gathering is on Wednesday at 5:30 on YouTube! Please make sure you have the link via email. If not please contact me.
January Online Craft Class
Club Order Bonus
For this Club from December 1-15 order $50 or more in product with host code XM4WRSGM or using the link https://www.stampinup.com?hostcode=XM4WRSGM to qualify. (You can also place your order directly with me but it will not be submitted until December 16.) There is no commitment unlike past Clubs. There is simply a bonus. To read more details about Club please go to https://stampingwithjoni.wordpress.com/cluborderbonus.
Last Chance List
The Last Chance list is available to shop from starting on December 1. If you would like a copy of the list ahead of time please check your email or contact me and I will send it to you.
Landers Second Saturday Craft Fair
The Landers Second Saturday Craft Fair is this Saturday, December 10 from 10-2 at Belfield Hall in Landers. There will be raffles, deal of the day, and more. Plan to come out! See you Saturday!
29 Palms Elks Craft Fair
This Sunday I will be at the Elks Lodge in 29 Palms from 10-4 for you to shop.
Online Shopping
My retired stamp sets as well as finished projects are now available online! There is not an option for local pick up except during the Open Day Session. Go to https://stampingwithjoni.wordpress.com/shop/ to take a look.
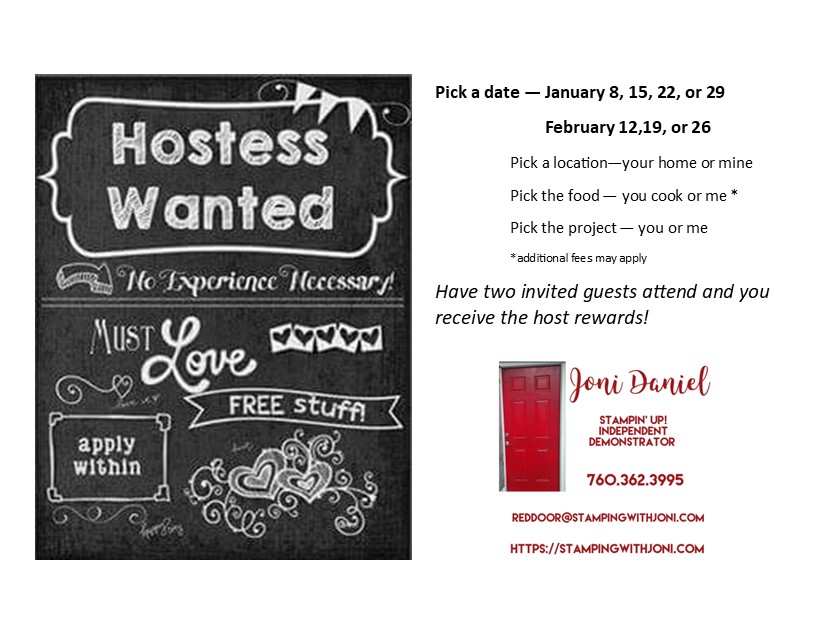
Host Availability
Are you missing in-person classes? Well, now you can choose everything. When you choose to be a host you get to pick exactly what you want: your location, your food, your projects, and your free products.
So let me know where I am going and when. I look forward to what ideas you have to share with me!
Save the date for Saturday, December 17. I will be at the 29 Palms Farmers’ Market from 8-1! This is your absolute last chance at Christmas shopping with me!
Save the date for Saturday, December 17 from 4-7 for the Christmas Party & Mini Catalog Open House!
It’s Sabbath Sunday! This is the day to rest so you can be recharged for the week.
Sunday is usually my slower day and it’s usually the day I have the most anxiety. I haven’t worked out for a day or two and I don’t have much planned. And my mind wanders.
So what’s the solution? Plan some fun activities like go for a walk, watch a movie, or just be creative with no class in mind. But why is this a struggle for me on a day with not much going on. Well, my mind has time to think and, after reading, exercise curbs anxiety and depression.
In an article titled “Exercise for Stress and Anxiety” it is stated that exercise not only helps with the physical condition as well as fighting disease, but it helps with mental fitness and reducing stress too. Some therapists are even starting to prescribe exercise instead of medicine for some cases.
As many of you know I was at the Yucca Valley Holiday Faire today. I held a raffle and I would like to announce the winner. Drumroll…please. Terri Quinn you are the winner of the Paper Pumpkin kit! Congratulations!
When you see this please comment. I will also contact you by email and text as well to congratulate you.
You can order from the Last Chance List! If you didn’t receive your copy please contact me so I can send it to you.
My personal Last Chance List is out. If you have not received it please check your email inbox as well as spam or junk. Please contact me if you need it to be resent.
And some companies let you choose where to give your money back to. For example, Subaru does this. But how often do I buy car? Not very often. Amazon also does this. Just go to https://smile.amazon.com/ and then remember to select your charity of choice. My charity of choice is Operation Gratitude. What’s yours?
Remember when you are shopping to be smart about it.
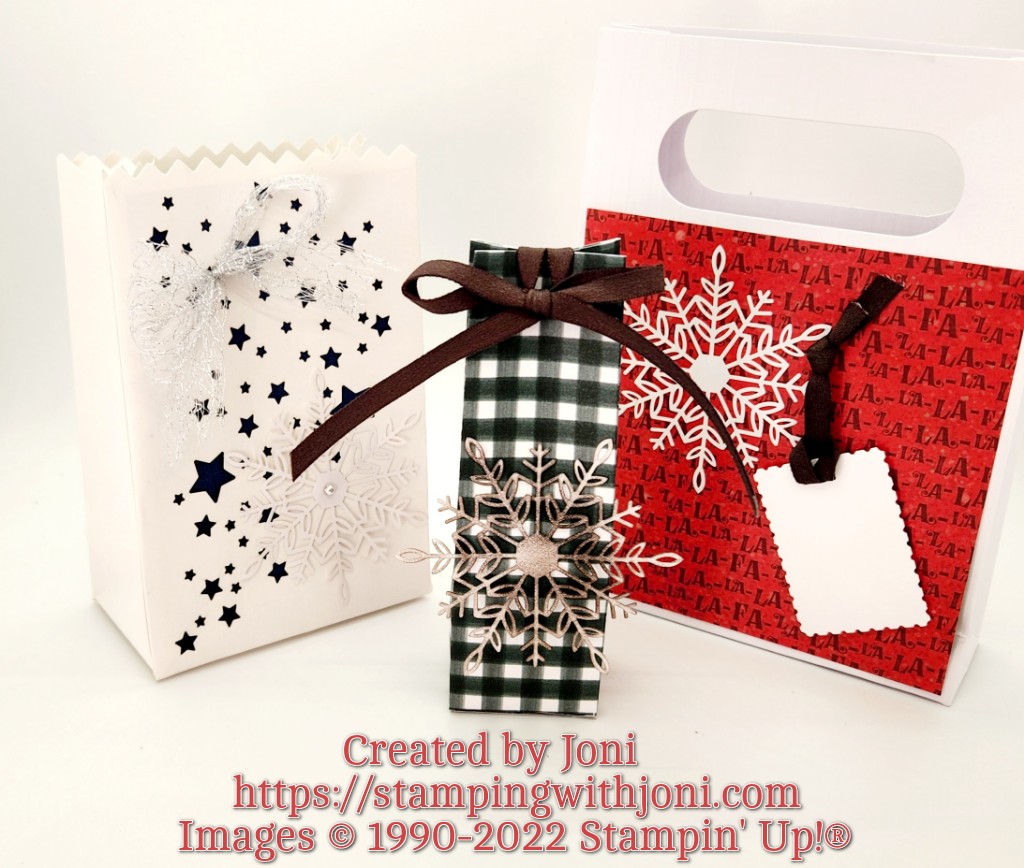
It’s Tutorial Thursday! Today I want to show you how to make a favor or bag without needing to order them. Now the other two bags are ones you will need to order.
Below is the list of needed supplies for each project and the measurements for cutting.
Embossed Treat Bag
4 ½” square from Santa Express 12” X 12” Designer Series Paper
Wonderful Snowflakes
Iridescent Rhinestones
Rectangle Punch for Tag
Early Espresso ¼” Faux Suede Trim
1 ½” Metallic Mesh Ribbon
Stampin’ Seal
Mini Glue Dots
Dimensionals
Embossed Treat Bag
Stars Treat Bag
Brushstroke 12” X 12” Specialty Paper cut to 3 ¼” X 5”
Wonderful Snowflakes
Festive Pearls
1 ½” Metallic Mesh Ribbon
Mini Glue Dots
Easy Treat Bag
Fitting Florets 12” X 12” Designer Series Paper cut to 6” X 6”
Scored at 1 ½”, 2 ¾”, 4 ¼”, 5 ½”
Turn once
Score at 1 ¼”.
Cut small rectangle out.
Cut up on score lines.
Tear & Tape Adhesive on tab and 3 of the bottom pieces.
Punch hole for ribbon.
Early Espresso ¼” Faux Suede Trim
Wonderful Snowflake flipped over and colored with Sponge Dauber and Early Espresso Ink. Attach with Mini Glue Dots.
Tag from Basic White Card Stock cut to 1 ¼”. Punched with Lovely Labels Pick a Punch. Stamp to/from with Scary Cute and Early Espresso Ink. Attach with Dimensionals.
It’s Wacky Wednesday where a product is used in a way it is not intended!
Did you know that lip balm can become a reindeer nose? Follow my page to see pictures of these cute creations. They will debut on Saturday for the craft fair.
It’s Technique Tuesday! To use the Snowfall Accents Puff Paint you will need a Heat Tool.
You put the paint over what you have stamped or not. It just needs to be where you want snow. Then you heat it slowly to create a 3D effect.
Now, here’s the funny part…take your Daffodil Delight Stampin’ Blends. After your “snow” cools off after heating it then you can color it. You can make a shadow from a nearby building or tree by using a very light gray, brown, etc. But you can also use the yellow to create “yellow snow”.