
It’s Tutorial Thursday! Today I want to show you how to make a favor or bag without needing to order them. Now the other two bags are ones you will need to order.
Below is the list of needed supplies for each project and the measurements for cutting.
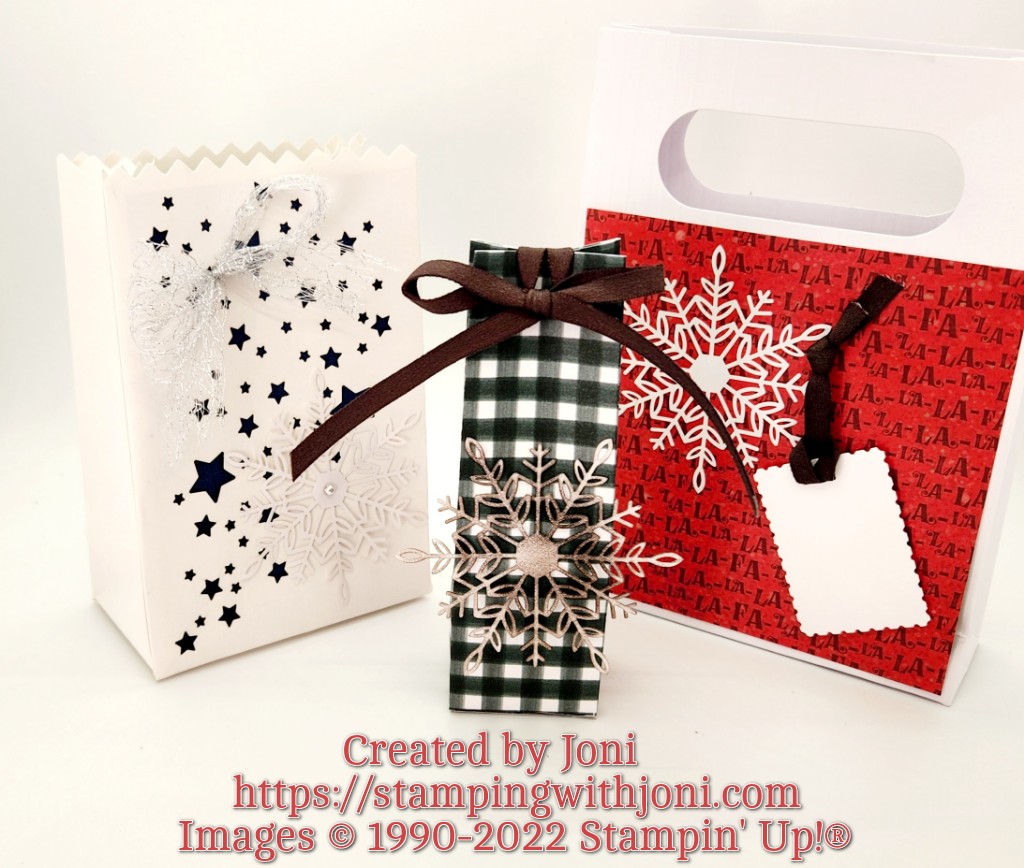
Embossed Treat Bag
- 4 ½” square from Santa Express 12” X 12” Designer Series Paper
- Wonderful Snowflakes
- Iridescent Rhinestones
- Rectangle Punch for Tag
- Early Espresso ¼” Faux Suede Trim
- 1 ½” Metallic Mesh Ribbon
- Stampin’ Seal
- Mini Glue Dots
- Dimensionals
- Embossed Treat Bag
Stars Treat Bag
- Brushstroke 12” X 12” Specialty Paper cut to 3 ¼” X 5”
- Wonderful Snowflakes
- Festive Pearls
- 1 ½” Metallic Mesh Ribbon
- Mini Glue Dots
Easy Treat Bag
- Fitting Florets 12” X 12” Designer Series Paper cut to 6” X 6”
- Scored at 1 ½”, 2 ¾”, 4 ¼”, 5 ½”
- Turn once
- Score at 1 ¼”.
- Cut small rectangle out.
- Cut up on score lines.
- Tear & Tape Adhesive on tab and 3 of the bottom pieces.
- Punch hole for ribbon.
- Early Espresso ¼” Faux Suede Trim
- Wonderful Snowflake flipped over and colored with Sponge Dauber and Early Espresso Ink. Attach with Mini Glue Dots.
- Tag from Basic White Card Stock cut to 1 ¼”. Punched with Lovely Labels Pick a Punch. Stamp to/from with Scary Cute and Early Espresso Ink. Attach with Dimensionals.
To see the video and to get full instructions please go to https://youtu.be/T6DpYJeykG4.
Happy Crafting!
With inky fingers,
Joni 🙂
