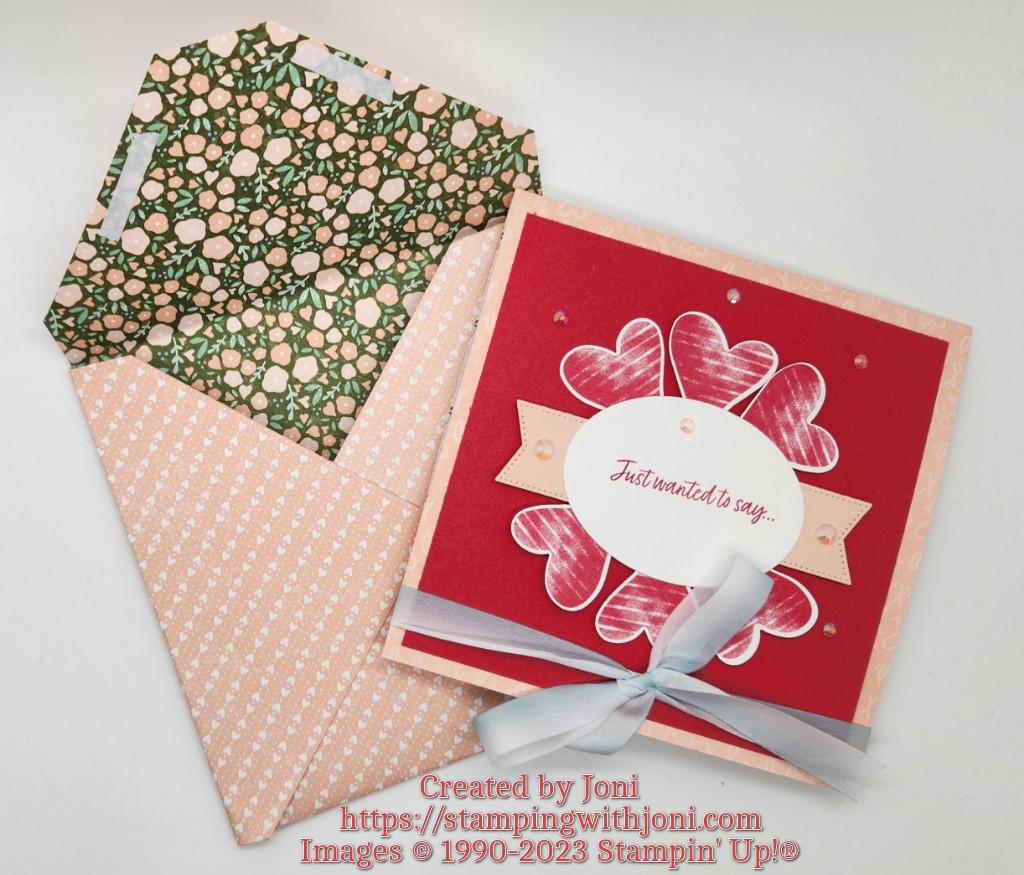
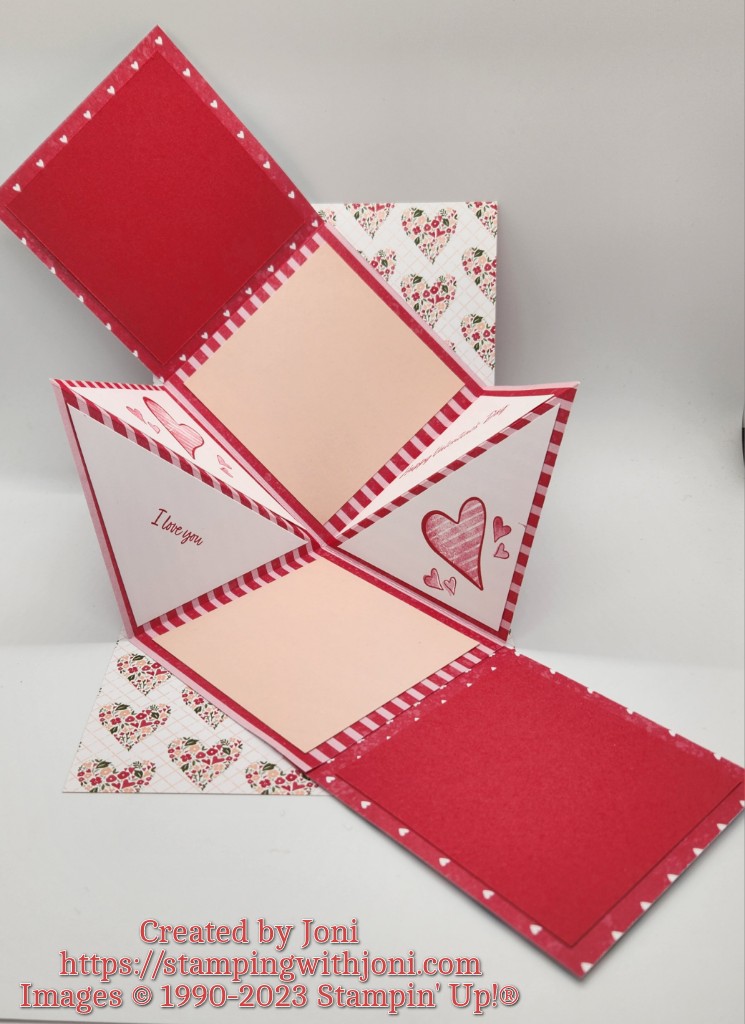
It’s Tutorial Thursday! Today I want to show you how to create an Extended Explosion Album.
For this album you will need at least two different coordinating patterns of Designer Series Paper, two coordinating solid colors of card stock, and Basic White Card Stock.
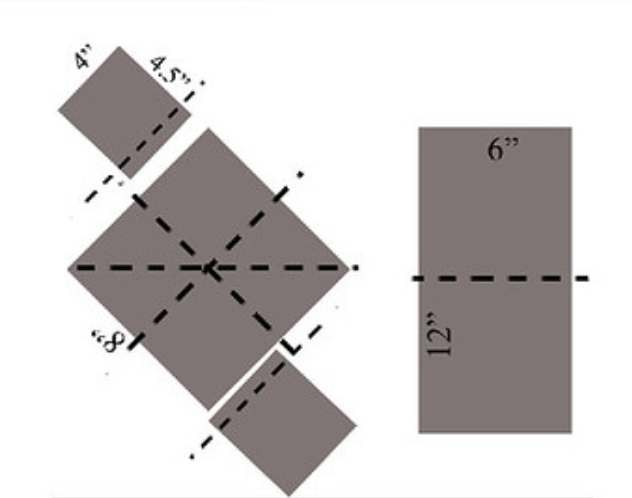
Here is the visual diagram on how to cut the card base.
The mats all need to be cut to 3 1/2″. For the ones that are triangles take the square and cut in half diagonally to create the mats.
If you want to print photos they will need to be 3″ square or at most 3 1/4″. If you don’t want photos then cut inner mats at 3″ square and decorate.
It’s Wacky Wednesday where a product is used in a way it is not intended!
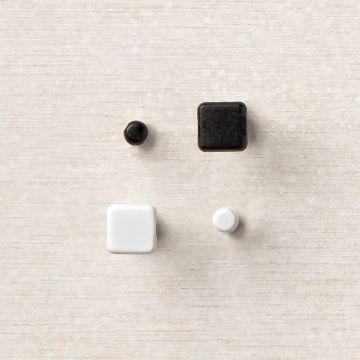
So we’ve embossed on card stock, cork, and glass but never on the head of a brad.
The brads we have right now are only in black and white…at least until now.
So I grabbed my reverse action tweezers and held the end of the brad tightly. I then dipped the head gently in Versamark Ink, the color ink of my choice, and Clear Embossing Powder. Then the magic Heat Tool melted that powder to reveal a colored brad.
But please note that the color will be lighter but will still coordinate. From left to right is Polished Pink, Sweet Sorbet, and Tahitian Tide.
It’s Technique Tuesday! When you run out of room on a project or want some more space to place your photos then add extension panels. It’s really pretty simple. Just add a quarter to a half of an inch, score, and place adhesive on your piece. Then it becomes an easy extension.
To learn how to create this extended explosion album please tune in to the YouTube Live on Wednesday at 7 pm at https://youtu.be/WtVQbMTyIac. If you would like to be notified when I go Live simply go to the link and push to be notified.
For this Club from January 16-31 order $50 or more in product with host code 744TXBYQ or using the link https://www.stampinup.com?hostcode=744TXBYQ to qualify. (You can also place your order directly with me but it will not be submitted until January 16.) There is no commitment unlike past Clubs. There is simply a bonus. To read more details about Club please go to https://stampingwithjoni.wordpress.com/cluborderbonus.
Lisa’s Class
Online Shopping
My retired stamp sets as well as finished projects are now available online! There is not an option for local pick up except during the Open Day Session. Go to https://stampingwithjoni.wordpress.com/shop/ to take a look.
Host Availability
Are you missing in-person classes? Well, now you can choose everything. When you choose to be a host you get to pick exactly what you want: your location, your food, your projects, and your free products.
So let me know where I am going and when. I look forward to what ideas you have to share with me!
It’s Sabbath Sunday! This is the day to rest so you can be recharged for the week.
Recently my daughter moved into her own cottage with no shared walls. I call it a cottage because it is small and nestled in the trees of an avocado orchard.
After she was unpacked and organized she slept so peacefully. She said she hadn’t slept that well in probably a few years. It’s amazing to me how some organization can get you the peace needed to rest well.
What recently have you gotten organized that has brought you peace and rest?
It’s Friendship Friday! This is the day to focus on giving back or paying it forward.
Today I want to share an article with you that gives 52 acts of kindness. Some are the usual, but some are quite different. Here’s some that stood out to me.
Bee prepared to help a bee. If it’s wet put it in the sun so it can dry out and then fly. If it just seems lost (on pavement) then place on a nearby flower. And if there’s nothing around make a little spoon of sugar water and place next to the bee so it can eat.
Pay a compliment to someone.
Join a stem-cell donor registry.
Make a mix tape. (Just kidding, kind of.) Take the time to put together a playlist of music and share with someone to let them know you are thinking about them.
It’s Tutorial Thursday! Today I want to show you how to create 3 cards with the By the Bay Suite.
The first card I am calling the fish one.
You will need:
Thick White Card Stock cut with the Paper Trimmer to 4 1/4″ X 11″. On the 11″ side score at 5 1/2″. This is your card base.
Cut the By the Bay 6″ X 6″ Specialty Designer Series Paper to 5″ X 3 3/4″. Attach with Stampin’ Seal to your card base. This is your outer mat.
Cut Night of Navy Card Stock to 4 1/2″ X 3 1/4″. Attach with Stampin’ Seal to your outer mat. This is your inner mat.
Cut Designer Series Paper with fish on it to 4″ X 2 3/4″. Stamp sentiment in Night of Navy Ink. Attach to inner mat with Stampin’ Seal.
Then attach Flat Adhesive-Backed Pearls in the corners.
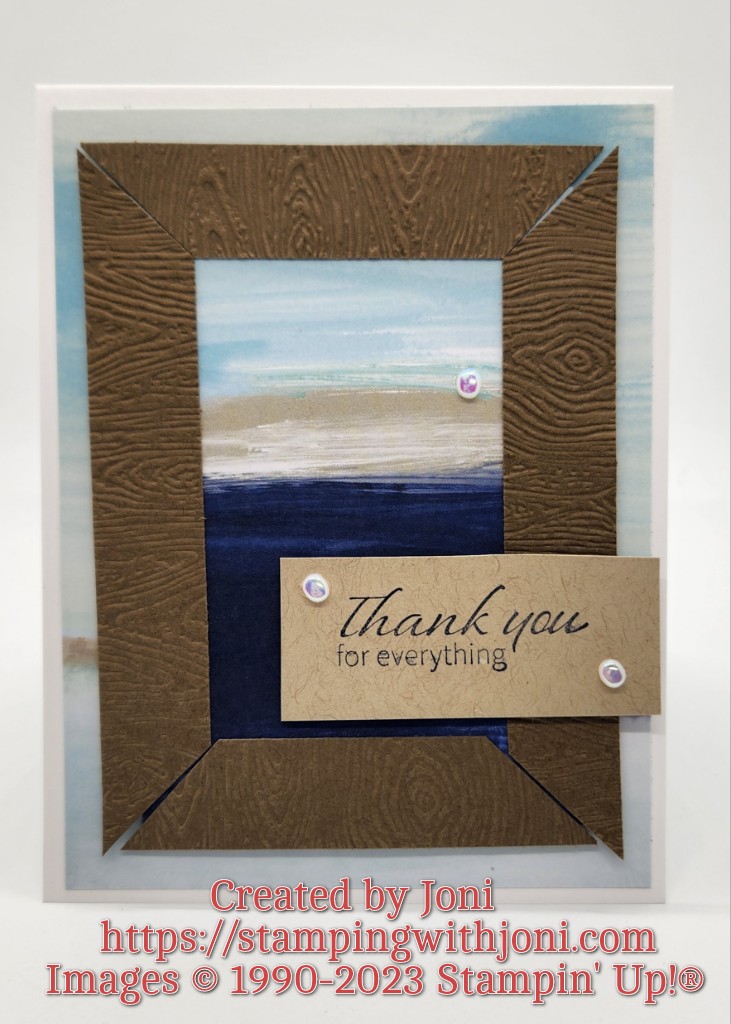
The second card is the framed landscape card.
You will need…
Cut a piece of Thick White Card Stock with the Paper Trimmer to 4 1/4″ X 11″. On the 11″ side score at 5 1/2″. This is your card base.
Cut a piece of By the Bay 6″ X 6″ Specialty Designer Series Paper to 5 1/4″ X 4″. Attach with Stampin’ Seal to your card base. This is your outer mat.
Cut another piece of Designer Series Paper to 4 1/4″ X 3″. Then take a piece of Soft Suede Card Stock and cut to 3/4″ X 4 1/2″ (2 pieces) and 3/4″ X 3 1/4″. Then match the corners to cut the corners. (Watch the video for this tip.) Then run through Machine with Timber 3D Embossing Folder. Attach to inner Designer Series Paper with Stampin’ Seal. Then attach entire piece to outer mat with Dimensionals.
Then stamp sentiment on Crumb Cake Card Stock with Night of Navy Ink. Trim accordingly. Attach to frame with Stampin’ Seal, Mini Glue Dots, or Dimensionals.
Attach pearls as wanted.
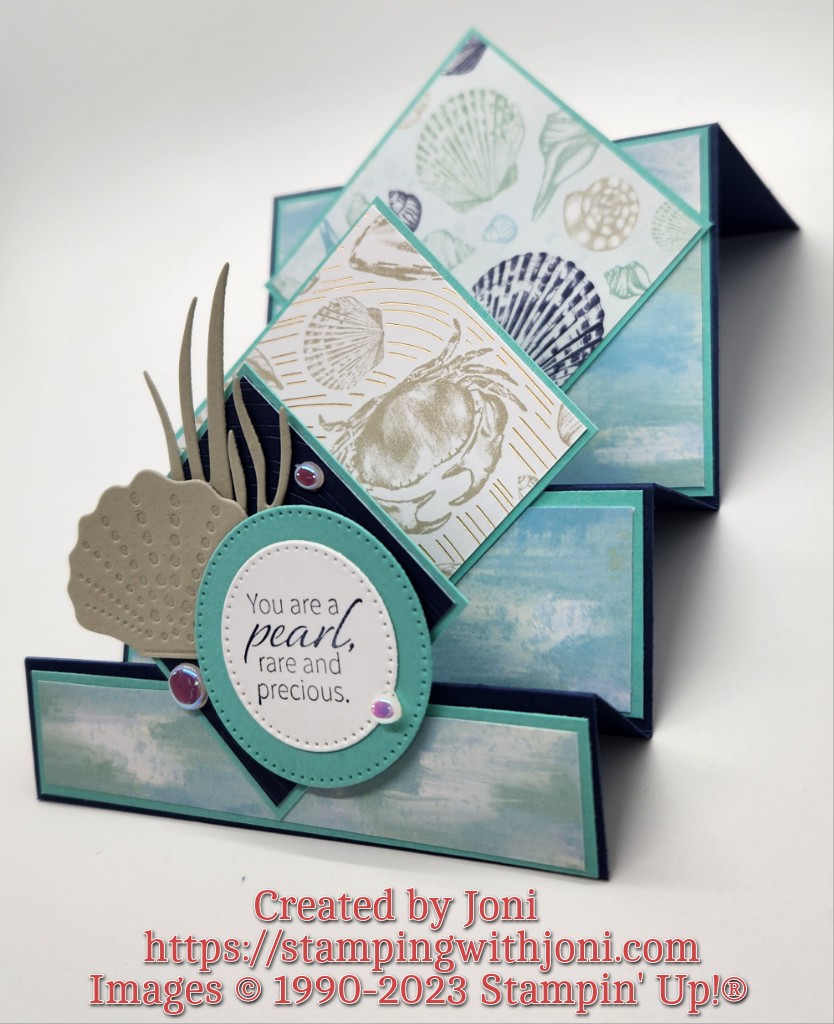
And last, but not least, the triple step card.
For this card you will need…
Cut a piece of Night of Navy Card Stock with the Paper Trimmer to 4 1/4″ X 11″. On the 11″ side score at 3″, 6″, 7 1/2″, 9″, and 10″. On the 3″ score bend to form a mountain fold. Then go opposite each score when folding.
For the diamonds you will need a piece of Coastal Cabana Card cut to 3″ X 3″, 2 1/2″ X 2 1/2″, and 2″ X 2″. For the inner mats of the diamonds you will need 3 different pieces of Designer Series Paper measuring 2 7/8″ X 2 7/8″, 2 3/8″ X 2 3/8″, and 1 7/8″ X 1 7/8″. Attach the inner mats to the outer mats with Stampin’ Seal.
For the mats for the steps you will need a piece of Coastal Cabana Card Stock cut to 2 7/8″ X 4 1/8″ (2 of these), 1 3/8″ X 4 1/8″, 7/8″ X 4 1/8″.
For the Designer Series Paper for the steps (you will want all one design) cut to 2 3/4″ X 4″, 1 1/4″ X 4″, and 3/4″ X 4″. Attach to all of the mats for the steps and then adhere with Stampin’ Seal to the actual steps.
Cut a piece of Basic White Card Stock to 2 3/4″ X 4″. Stamp sentiment in Night of Navy Ink and shells with sand in Sahara Sand Ink.
Cut out shell and grass with Sahara Sand Card Stock and coordinating dies. Then cut out a stitched circle (second to the smallest) in Basic White Card Stock with Stylish Shapes Dies. Then cut out a larger circle in Coastal Cabana. Layer all on front of the card.
Attach pearls as wanted.
To decorate the envelope flap to coordinate with the card please cut a piece of Designer Series Paper that matches the steps to 2 1/4″ X 6″. Attach on flap of the envelope with Stampin’ Seal. Trim with Snips.
It’s Wacky Wednesday where a product is used in a way it is not intended!
Today I want to talk to you about choices. Did you know that there are certain stamp sets that are offered in photopolymer or cling? You get to choose.
There are pros and cons to both kinds.
For photopolymer: you can see where you are stamping, but the stamps are a bit more fragile.
For cling: the images seem to be a bit deeper and are not as fragile, but you can’t see exactly where the stamp is going.