Cards need a holder.

It’s Tutorial Thursday! Today we are making a holder for all those cards. This is perfect timing for World Card Making Day this Saturday.

So here’s how you create a holder or open-ended box.

Cut a piece of Whisper White Card Stock (thick is preferred) to 7 1/2″ X 9 1/2″. Then on the 7 1/2 side score at 1 1/2″ on both sides. On the 9 1/2″ side score at 4″ and at 5 1/2″. Cut up both middle scores until you hit the next score line. Then glue together using Stampin’ Seal + or Tear & Tape.

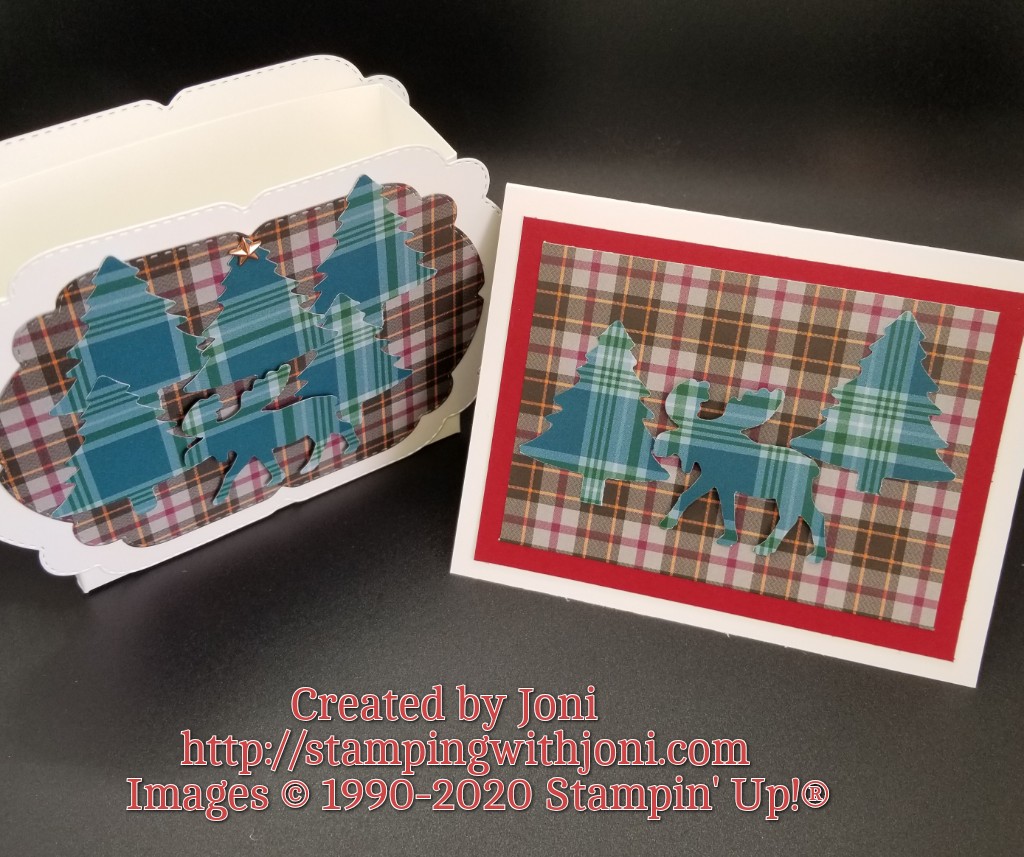
Die cut out the largest of the Celebration Labels Dies from Whisper White Card Stock twice. Then die cut out the second size down from Plaid Tidings Paper. Then punch the trees and moose to decorate.

If you would like full instructions and a video please go to https://youtu.be/BlpTAwj-GNk.

Happy Crafting!

With inky fingers,

Joni 🙂

Into the kitchen for craft supplies?

It’s Wacky Wednesday where a product is used in a way it was not intended!

For today we are walking into the kitchen and grabbing that dreaded saran or plastic wrap. You know the stuff. The one that bunches up as soon as it begins to tear off the roll. For today it is going to become your palette.

Grab a piece of wrap that is just larger than your card stock mat. Drop ink on it and smoosh around, spritz, do whatever you need to do to make it look “right”. (You might want to do this step over a silicone mat or paper towel so you don’t get ink everywhere.) Then drop the card stock mat on top of all that lovely ink to transfer your background. This will become your background. After you can add shimmer paint to accent or whatever you feel. Then, after it dries, place a label for words and you are ready to go.

Happy Crafting!

With inky fingers,

Joni 🙂

Framing with a sponge.

It’s Technique Tuesday! Today we are using the Sponge Brayer to create a frame.

As I was creating this card I knew what I wanted in the center but I had too much blank space on the outer edges. Instead I thought I should create a lighter mat or frame. So I grabbed my Sponge Brayer.

For this technique you will need the Sponge Brayer, your mat, ink, and a piece of scratch card stock. Place the card stock over what you want to mask or protect. Then take the brayer and ink and roll.

Happy Crafting!

With inky fingers,

Joni 🙂

World Card Making Day, Open Day, and More!

It’s Management Monday! Here’s what’s happening this week.

Later today I will be sending out what’s happening in detail for World Card Making Day.

I have Open Day this morning and evening with openings in each. Let me know that you are coming.

Save the date for Card Class on October 6, 8, or 10.

Happy Crafting!

With inky fingers,

Joni 🙂

Rest by hiding.

It’s Sabbath Sunday! This is the day to focus on resting and recharging for the week ahead.

Do you know that sometimes the best way to truly rest is to hide? Yes, hide!

With all of the political unrest, schools being held virtually, and half of the businesses still closed sometimes the best way to find peace is to stick your head in the sand. In order to survive this time of turmoil you might need to breathe and hide in your blanket fort for a bit.

My fort is big enough to make cards and have sparkly pretty things. If you need me I will be in my craft room finding peace.

How do you find rest? What do you shut out? Where do you go to bring everything back into perspective?

Happy Crafting!

With inky fingers,

Joni 🙂

World Card Making Day

It’s Sale Saturday! There’s a few things coming up for promotions that you should know about.

First, the Designer Series Paper sale starts on October 1 and runs all month long.

More details coming as soon as I get them.

World Card Making Day is just around the corner on Saturday, October 3. Do you want to participate in this creative event? Here is what we are doing. For $15 you will get 8 card bases, 8 outer mats, 8 inner mats, 2 pieces of neutral card stock to make accents, and a pack of Dimensionals. This package will be sent USPS Priority Mail. There will also be contests that day via email and Facebook. If you purchase the card making kit you will get double entries for some of the contests. And yes, there are prizes. (But no discounts on this one. You can use a gift certificate for payment.)

A more detailed email will be coming out shortly. In the meantime…please let me know if you are interested in a kit.

Happy Crafting!

With inky fingers,

Joni 🙂

How to be present.

It’s Friendship Friday! This is the day to focus on giving back or paying it forward.

Recently my girlfriend lost her husband to cancer. They had been married over 20 years, he was a retired Marine, and had led a very similar path to my husband and I. He was 53 and had retired just two years after my husband. But shortly after he retired they found a tumor. He conquered it once but not the second time.

So why am I talking about this? Well, because it makes me wonder what I can do to help her. And, honestly, not a lot. It’s part of life, unfortunately.

Instead I started to search online for how to be present, how to be a friend, or what to say when someone is grieving. There were some interesting things listed but here is what I found.

The number one thing that was written about was to listen. Be present. Don’t interrupt. Just listen.

And the other thing was to ask how you could help. Instead of jumping in and doing, ask first.

I hope these help you. For me they are a great reminder that the best of intentions may not always be received well, so make sure to ask and then listen.

Happy Crafting!

With inky fingers,

Joni 🙂

Cobwebs everywhere.

It’s Tutorial Thursday! Today we are learning how to make sparkly cobwebs. These are the kind you want to have around home. While I stamped some spiders I promise they won’t bite. Here is what we are creating.

For this card you will need:

  • Thick Whisper White Card Stock
  • Gray Granite Card Stock
  • Basic Black Card Stock
  • Cobwebs 3D Embossing Folder
  • Hallows Night Magic Cling Stamp Set
  • Gray Granite Ink Pad
  • Tuxedo Black Memento Ink Pad
  • Versamark Ink Pad
  • Silver Emboss Powder
  • Heat Tool
  • 1 1/2″ Metallic Mesh Ribbon
  • Stampin’ Seal
  • Mini Glue Dots
  • Everyday Label Punch
  • Snips
  • Grid Paper
  • Stampin’ Scrub
  • Stampin’ Mist
  • Clear Blocks
  • Tear & Tape
  • Paper Trimmer

For complete instructions please see the video on YouTube at https://youtu.be/0uwzRi-Nbjk.

Happy Crafting!

With inky fingers,

Joni 🙂

Decorating ribbon.

It’s Wacky Wednesday where a product is used in a way it is not intended!

Today we are grabbing our ink pads and markers with a blank canvas of woven trim from the Flowers for Every Season Ribbon Combo Pack.

We are grabbing the middle one in the picture above and stamping on it, coloring it, and more. In the photo below is the ribbon decorated.

The only technique I did not demonstrate is when you dip the ribbon in a container filled with water and ink to dye it.

From left to right…

  • a Cajun Craze Stampin’ Write Marker was used on the brush tip to create stripes
  • a Cajun Craze Stampin’ Write Marker was used on the thin tip to create polka dots
  • a Cajun Craze Ink Pad was pressed on to the ribbon to change the color completely
  • a Cajun Craze Ink Pad and the acorn from the Beautiful Autumn Cling Stamp set was used to stamp

Just because something comes as a white ribbon doesn’t mean it has to stay that way.

Happy Crafting!

With inky fingers,

Joni 🙂

First Day of Fall

It’s Technique Tuesday! I thought what better way to celebrate the first day of Fall or Autumn than with my favorite for the season…candy corn. Some of you might think falling leaves but just look at this cute card.

The technique I want you to take away from this is how to make those delicious candies. I used the Stitched Triangles Dies and was able to enjoy these fall treats without gaining one pound.

So remember not only to look at what you have upside down and backwards, but also look at what it can become if pulled apart.

Happy Crafting!

With inky fingers,

Joni 🙂