It’s Wacky Wednesday where a product is used in a way it is not intended!
Have you ever had that one pattern of Designer Series Paper that was too plain for you? Take a Multipurpose Glue and put some glue sparingly on the paper. Then add the Gilded Leafing to add some flair to that boring page.
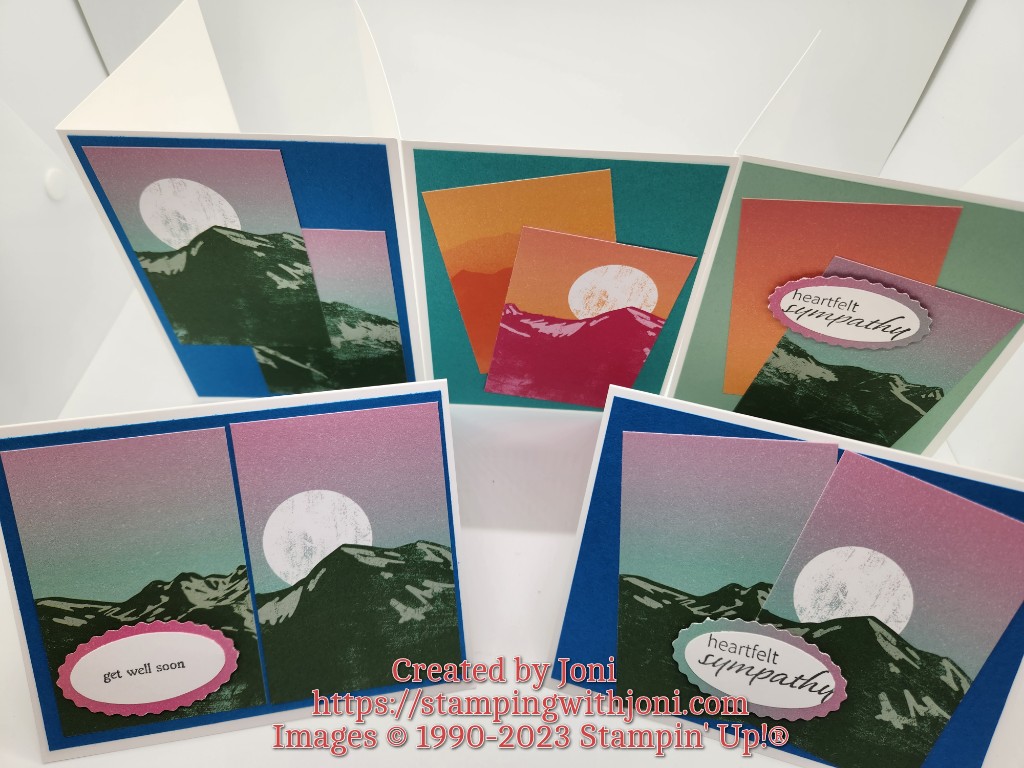
It’s Technique Tuesday! Today I want to show you how a really good set of Designer Series Papers will do all of the talking for you. Sometimes you don’t even need to stamp. But when making your paper the focal point make sure your blades are sharp. You don’t want to have ragged edges.
It’s Management Monday! Here’s what’s happening this week and maybe a bit beyond.
8th Annual Rubber Rummage Sale
Come on out for the 8th Annual Rubber Rummage Sale this Saturday any time from 10-3! Make sure to pick out a dozen pieces of Designer Series Paper for FREE just for showing up! When you bring a friend you will get your paper and a pick from a goodie basket as well!
Last Chance List
The Last Chance List is up! All products are while supplies last (and some are already sold out). So don’t wait. And please remember to use the host code F29T2HE3 (see Order Bonus below) to qualify for the freebie.
YouTube Live
I will no longer be doing a YouTube Live every Wednesday at 7 pm along with the DIY Kits. Instead I will periodically come on to unbox new products, talk about retiring items, show a great new project, etc.
I will be offering DIY Kits still, but they will be seasonal. And instead of having a week to order, you will have a certain number of kits that you can order. All DIY Kits in the future will be while supplies last and offered in my shop at https://stampingwithjoni.wordpress.com/shop.
Order Bonus
For this rotation from April 16-30 order $50 or more in product with host code F29T2HE3 or using the link https://www.stampinup.com?hostcode=F29T2HE3. (You can also place your order directly with me but it will not be submitted until May 1.) There is no commitment to order regularly. This is simply a bonus. To read more details about the Order Bonus please go to https://stampingwithjoni.wordpress.com/orderbonus.
Online Shopping
My retired stamp sets as well as finished projects are now available online! If you prefer local pick up then contact me before ordering. There is no deliver option except via shipping. Go to https://stampingwithjoni.wordpress.com/shop/ to take a look.
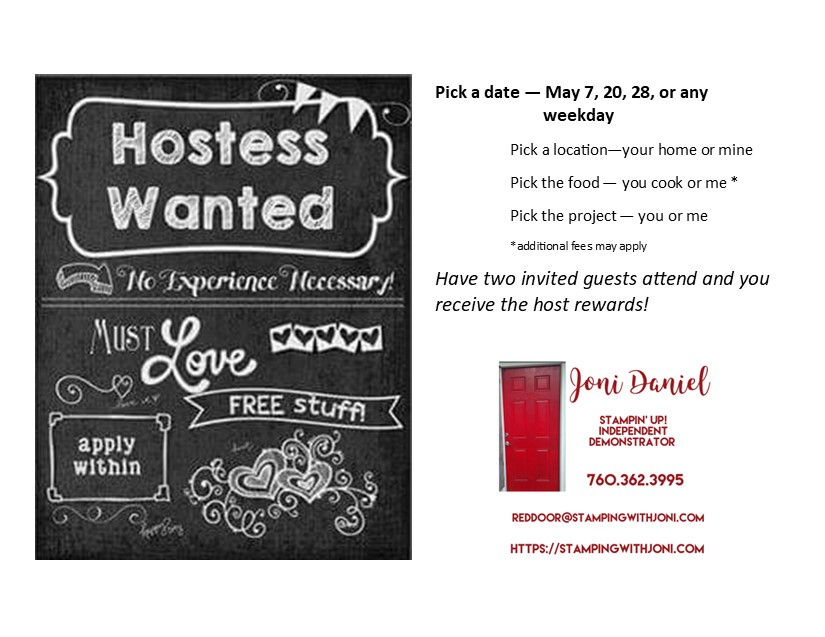
Host Availability
Are you missing in-person classes? Well, now you can choose everything. When you choose to be a host you get to pick exactly what you want: your location, your food, your projects, two basket goodies, and your free products.
So let me know where I am going and when. I look forward to what ideas you have to share with me!
Just a reminder that the Last Chance List is available. If you need a copy please comment or contact me. Please remember…all items are while supplies last. Yes, the Last Chance List qualifies for the Order Bonus as long as you put the host code in during checkout. This host code finishes tonight at midnight. The new code will be announced early Sunday.
It’s Friendship Friday! This is the day to focus on giving back or paying it forward.
So often I love to find ways to give back within the crafting community. Well, I found a new one called Loose Ends. Loose Ends is an organization that helps to finish, well, the loose ends. If someone has passed away or is no longer able to craft then Loose Ends will help. You can fill out an application for them to complete your project. But, on the other side of this, you can apply to be a finisher as well.
It’s Thumbtack Thursday! Since I am not doing the Lives any more on Wednesday evenings I figured the theme for today could change as well.
So let me explain what I mean by Thumbtack Thursday. Today is the day that you share your favorite card or project you have created. Something you have made that you deem worthy of putting up on the board. So share with everyone what you are putting the proverbial thumbtack in to show.
This is the timeline for when I will release my Personal Last Chance List.
Please note that all sales are final (no changing your mind) and all are while supplies last.
You are reserving what you would like ahead of me placing them online for sale.
Since the products do not retire until May 2 I will not be accepting payment until then. You can pick up on or after May 2 or pay $6.95 additionally for shipping per order, not per item.
On Friday, April 14 I will release my list to my Team via email. You will have through Tuesday, April 18 to choose.
On Wednesday, April 19 I will release my list to my VIPs via email. You will have through Sunday, April 23 to choose.
On Monday, April 24 I will release my list to my Crafters via email. You will have through Friday, April 28 to choose.
Then on Saturday, April 29 you will be able to shop in person at the Open Day any time from 10-3.
And finally on Tuesday, May 2 all items that are not reserved will be posted online.
I hope this helps you to be more clear on what’s going on. If you have any questions you know where to find me.
It’s Wacky Wednesday where a product is used in a way it is not intended!
Today I want to show you how to color without using a marker. You will need an ink pad but nothing else. Not even a stamp.
You simply find a die that both cuts and embosses at the same time. Then you dip the raised side in your ink pad color of your choice and gently pull it off. For me I find it easier to flip the ink pad upside down and then catch the inked die in my hand or on to the cutting plate of the Stampin’ Cut & Emboss Machine. Then I place the die, card stock, and cutting plates as usual and run them through the machine.
After you have a cut out that is already colored and ready to go.
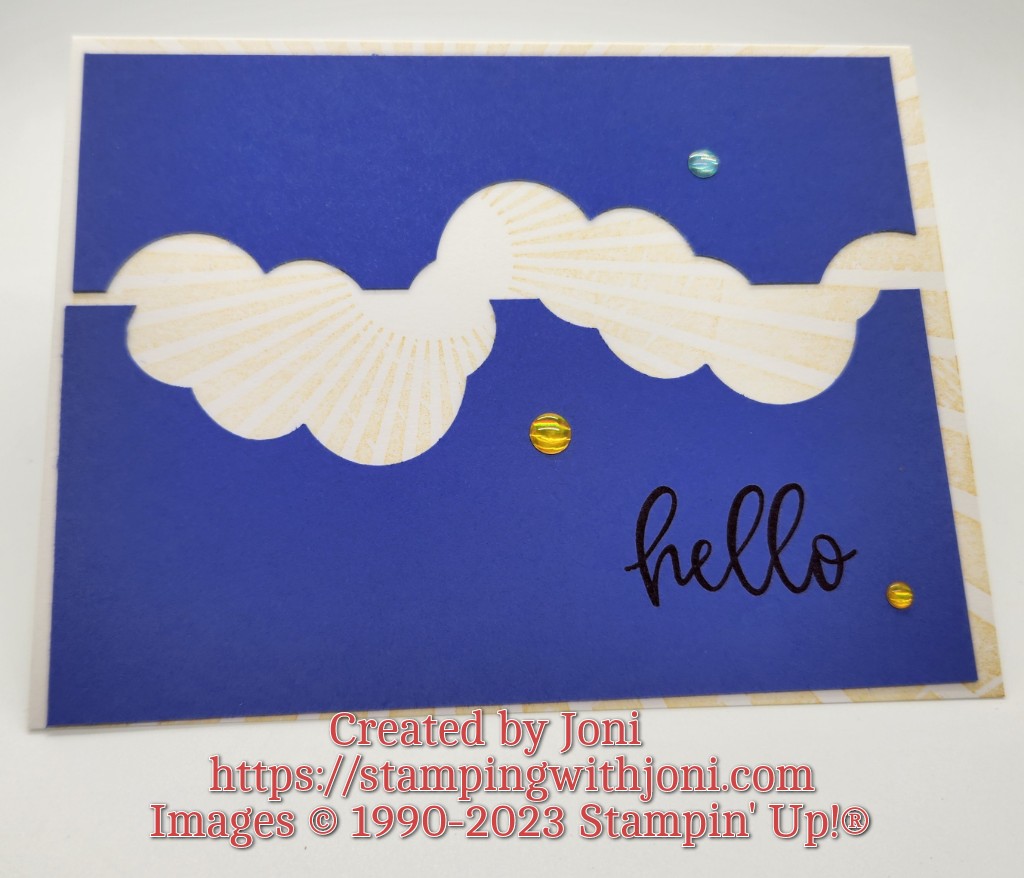
It’s Technique Tuesday! Today I want to show you a new way of using a punch.
Usually a punch is used to create a shape or a hole to be used as the original design. But this time I used the Cloud Punch to create more of an edge rather than an accent piece.
What other punches do you have that can be used in this way?