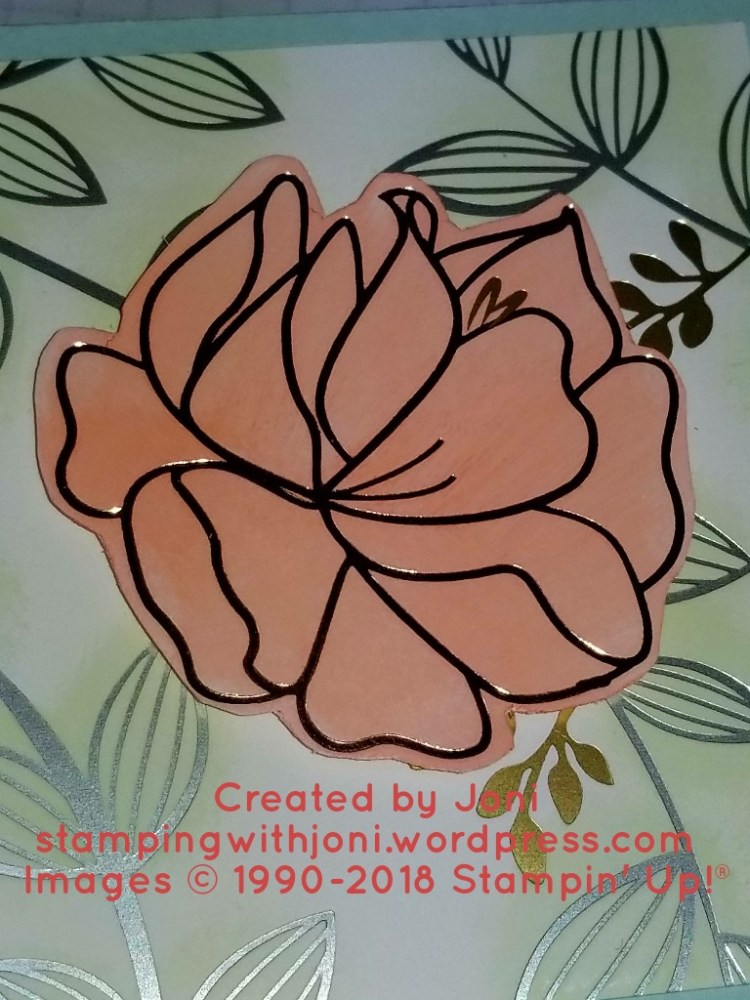
The re-inker bottles are not just for re-inking your pads. You can also drop a few drops of color in an aqua painter to make a watercolor wash. You can drop a few drops of different colors on a baby wipe to create your own “ink pad”. But today we are going to use the re-inkers as paint.
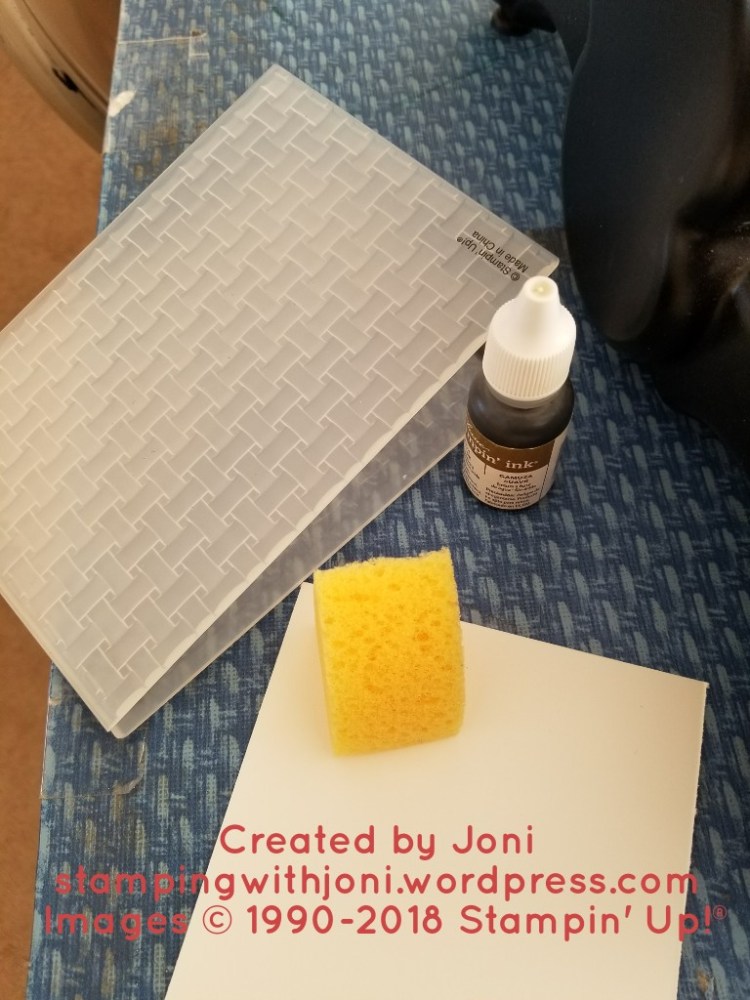
Take about 10 drops of a chosen color and place on an embossing folder. (This technique works especially well with the new 3D folders.) Grab a sponge or part of one and streak the ink across the folder.
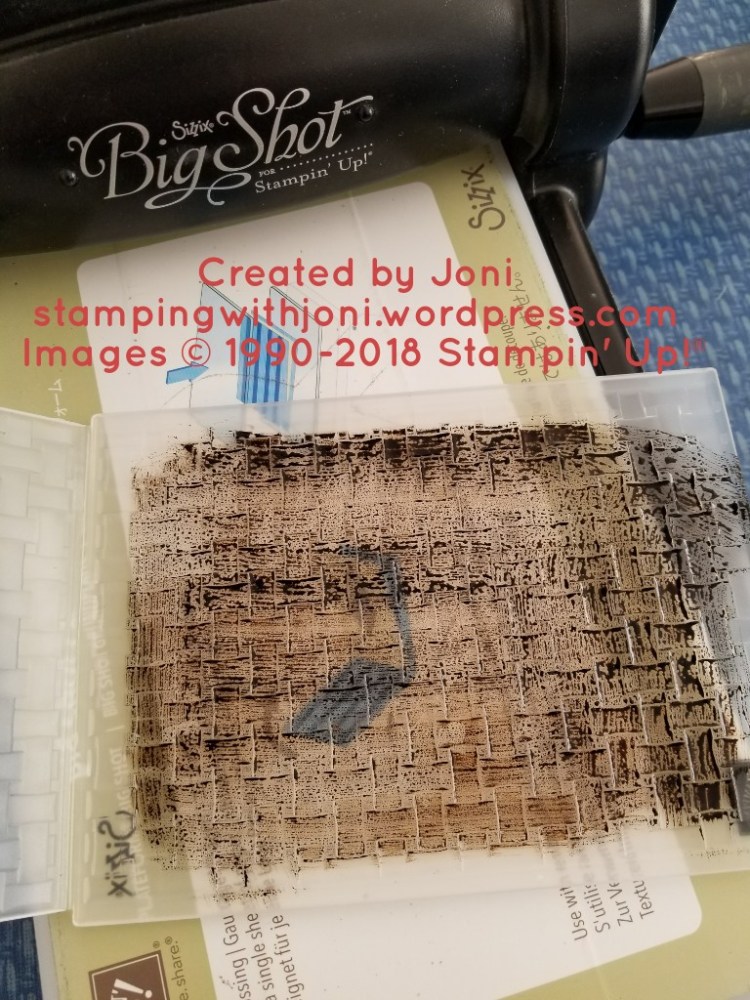
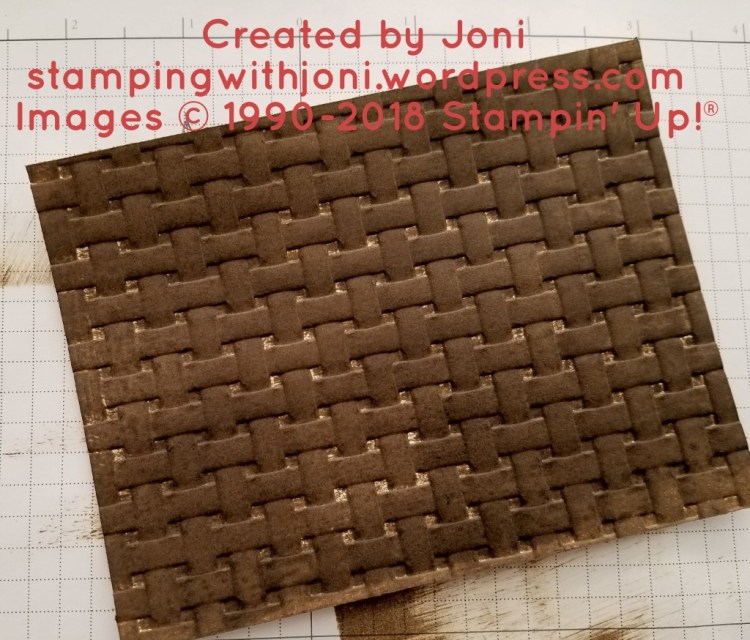
Then place cardstock quickly before ink dries and run through Big Shot. After running through you might need to grab that same sponge and fill in where there might be missing ink sections.
See the completed project on tomorrow’s tutorial.
Happy Crafting!
With inky fingers,
Joni 🙂