
Stamp with a light outline color if you want just your coloring to show.


Happy Crafting!
With inky fingers,
Joni 🙂
Stamp with a light outline color if you want just your coloring to show.
Happy Crafting!
With inky fingers,
Joni 🙂
Are you ready for the week? I’m not quite there. I hope you are better prepared than I am. Well, regardless if we are ready, here we go…
On Saturday, March 24th come out for Woof Walk at Pappy and Harriet’s. I will be up in the courtyard ready for you!
Save the date on March 29-31 for the Gem & Mineral Show at the Joshua Tree Sportsman’s Club. The show runs through the 1st. I will be there only through Saturday. Come on out to see some amazing jewelry, geodes, and awesome papercrafting.
If you would like to order from the third release of Sale-A-Bration please let me know! Please use host code XV3UXFTS to help Penny. If you prefer to order in person please contact me.
Happy Crafting!
With inky fingers,
Joni 🙂
Sometimes I rest and other days I catch up. Today I catch up. I am resting by getting back organized and ready to conquer the week. Some days you just have to clean things out and get back ready to running again. How are you preparing for today and this week?
Happy Crafting!
With inky fingers,
Joni 🙂
There are less than two weeks left for Sale-A-Bration and another release of products has just been added. Here is a photo of the items instead of a list.
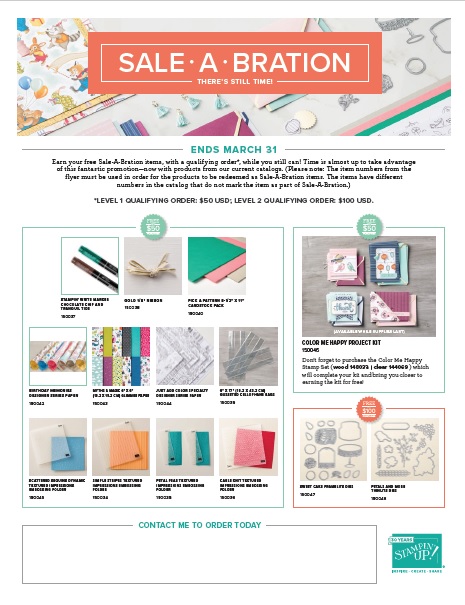
If you have any questions please contact me.
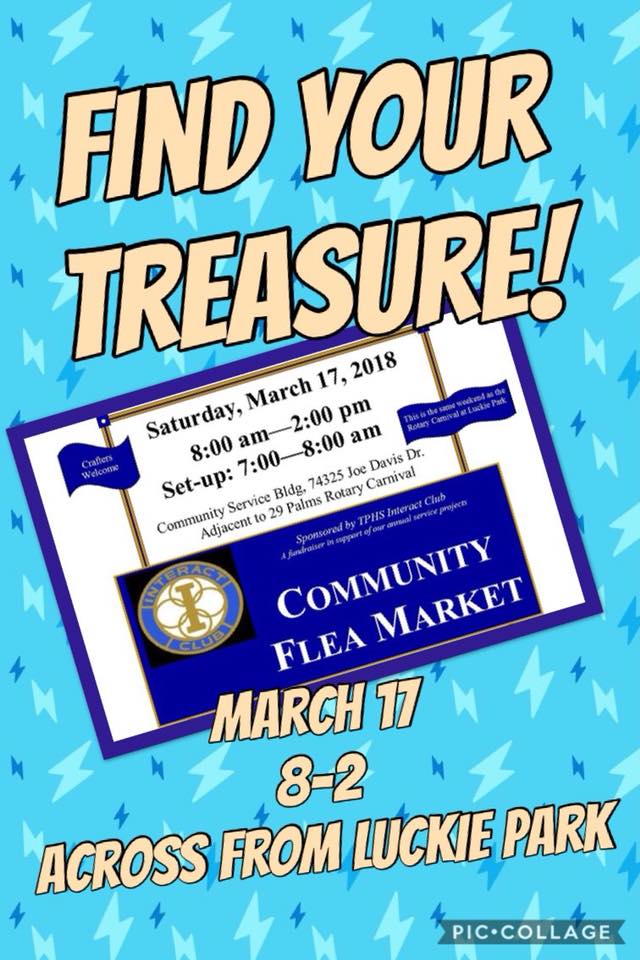
From 8-2 today I will be at the Community Center in 29 Palms for the Flea Market. Come see me before the wind comes in tonight. I will be drawing one lucky winner for a $25 gift certificate. (You do not need to be present to win, just to enter.) I will also have vouchers for anyone that checks in with me. Be looking for the red crate. Everything inside the red crate is 50% off for today only.
If you would like to order online please use host code XV3UXFTS. If you prefer to order in person please contact me.
See you at the market!
Happy Crafting!
With inky fingers,
Joni 🙂
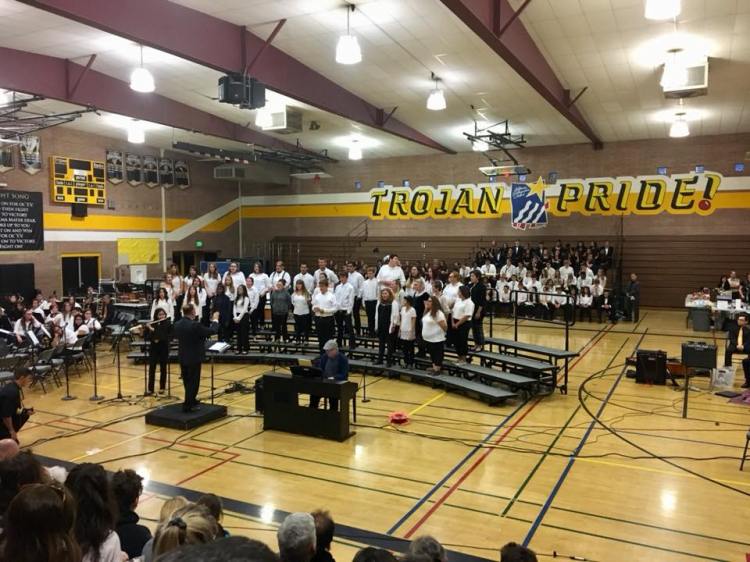
Sometimes you don’t even realize when you fill someone up, give back, or pay it forward. (It just depends on how you want to say it.) Well, I was filled to the brim last night. Tara, my daughter, had her concert last night (and first solo) and I was able to take off at 3:30, pick up a friend of hers, grab a pizza, and enjoy her concert. There was no guilt of what else I was missing. No thought that I should be home making calls, finishing paperwork, etc. like with the previous business. Thank you for your support in this. Here is a photo from last night.
Without you coming to class, ordering, and just making my job enjoyable I wouldn’t be able to have moments like this. Thank you.
Without you knowing it you gave back. Now I’m not saying you’re completely off the hook but THANK YOU. If you have a card to mail go do that. If not, go create one. Share a smile, a coffee, whatever it takes. You never know when you will make a difference.
Here’s to creating impact through creativity!
Happy Crafting!
With inky fingers,
Joni 🙂
As St. Paddy’s Day gets closer I am finding other stamp sets to create some luck. Last night on Facebook Live I created two more cards with shamrocks and no official shamrock stamps. You just have to look sideways sometimes.
Here are the two cards and following is the link for the video.


And here is the link for the video. https://youtu.be/pwPwyFEAayo
Happy Crafting!
With inky fingers,
Joni 🙂
Recently my daughter began to drive. We signed her up for driving lessons. We paid the fee, received a receipt, and the driving instructor showed up to begin the lesson. It wasn’t about the money. It was about her learning to drive.
I say this because I don’t ever want you to feel that I am here just to collect orders. I want it to be more than that. I want you to pay your fee, but most importantly, I want you to learn. Learn how to do something new. Learn how to laugh again after a tough week, month, or year. Learn that a creative mistake can be easily fixed. I want you to think of me as a coach that keeps stress levels in check, helps with the creative process, or simply is here to laugh with.
I am here for you. Please ask questions. Please share a laugh. Creating is so much more than just the fee. I want you to be free enough to create impact through creativity. Thank you for allowing me to be a part of your creative journey.
Happy Crafting!
With inky fingers,
Joni 🙂
Do you remember about 5 years ago in class we learned the black magic technique? We stamped on black cardstock and used the white gel pen to accent the stamped image. This gave an almost 3D look.
This technique has had an update.
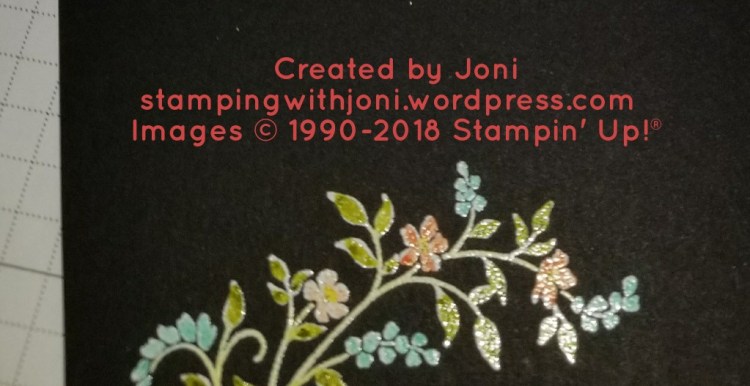
Emboss like normal with the versamark pad, white embossing powder, and the heat gun. After heating and letting cool take your stampin’ blends and gently tap on the powder to apply color. You do not want to color like normal. The embossing powder has texture and will fray your tips so just gently bounce or tap the color in.
Post your creations with this technique on the Facebook page and get reward points.
If you would like to order to create this project simply contact me.
Happy Crafting!
With inky fingers,
Joni 🙂
How’s your week shaping up? I know it’s only Monday morning but time is precious. Here are some fun things to do. Bring a friend and make a memory.
On Saturday the 17th from 8-2 at the Community Center on Joe Davis is a Flea Market. I will be across from the carnival. Come get some great deals!
On Saturday, March 24 come out to Pappy & Harriet’s for Woof Walk. I will be in the inner court yard on the back side of the restaurant.
Be looking for more details on our annual Sale-A-Bration Mourning Party as this great promotion comes to a close.
If you would like to order online please use host code Q9YJ79MN to help Sandy until 9 pm tonight. If you prefer to order in person please contact me.
Since it’s Monday there are also drop in times today. Come finish a project, ask questions, or simply say hello.
Happy Crafting!
With inky fingers,
Joni 🙂
If you’re like me this time change always messes with me. I feel like I am right on time but yet I am late. I have the feeling this will be how things are for the next few days. Are you joining me?
So instead of stressing out, I will be late for a day or two. You are not going crazy. You didn’t miss anything. I chose to rest and not be crazy about this mess. How are you resting today?
Happy Crafting!
With inky fingers,
Joni 🙂
