
It’s Tutorial Thursday! Today I want to show you this cute Oval Hearts Card and Candy Favor.
Now normally I would ship this DIY Kit on Monday but I am doing a special shipment on Friday afternoon so you can have the project in time to make it for Valentine’s Day. You need to order it by Friday at 10 am to be included in this rush shipment.
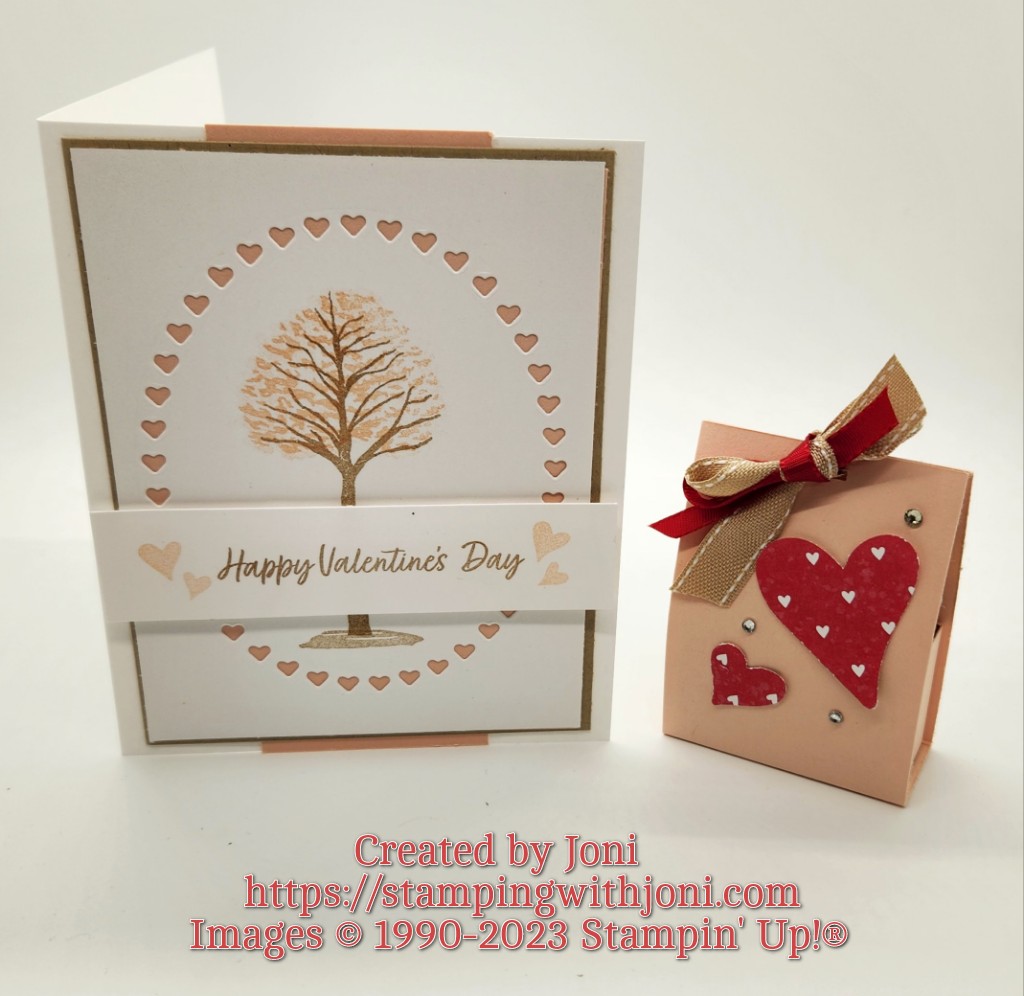
So this is the card and the favor.
Here are the directions for the card and the favor.
Valentine Tree Card
- Cut Thick White Card Stock with the Paper Trimmer to 5 ½” X 8 ½”. On the 8 ½” side score at 4 ¼”. This is your card base.
- Cut Petal Pink Card Stock with the Paper Trimmer to 5 3/8” X 2”. This is your banner behind. Attach when the front mats are finished.
- Cut Crumb Cake Card Stock to 5 1/8” X 3 7/8”. This is your outer mat that the banner will eventually be attached to.
- Cut Basic White Card Stock to 5” X 3 ¾”. Die cut out the oval from Framed Florets Dies. Stamp the tree from Beauty of Friendship in Crumb Cake and Petal Pink Ink.
- Cut Petal Pink Card Stock to 4 7/8” X 3 5/8” to attach behind the White with Stampin’ Seal.
- Take a scrap of Basic White Card Stock to stamp the sentiment in Crumb Cake Ink and the hearts in Petal Pink Ink. Attach with Dimensionals.
- Attach the White to the Crumb Cake mat with Stampin’ Seal.
- Now attach the banner behind with Stampin’ Seal.
- Attach all to the card base.
Candy Holder
- Cut Petal Pink Card Stock with the Paper Trimmer to 2 ¼” X 7”. On the 7” side score at 3” and 4”. Punch ribbon slots with the Very Best Trio Punch.
- Cut more Petal Pink Card Stock to 1 ¼” X 3”. On the 3” score at 1” and 2”. Attach to the sides as you bring up with Tear & Tape Adhesive.
- Place chocolate inside.
- Cut ribbon with Snips from Real Red & Burlap Ribbon Combo Pack to approximately 10” long. Tie through top holes and trim ends.
- Punch out hearts with Country Bouquet Punch in Country Floral Designer Series Paper. Attach with Mini Glue Dots.
- Attach Rhinestones as wanted.
- For the back, take a scrap of Basic White Card Stock and punch out a piece from the Rectangular Postage Punch. Attach with Stampin’ Seal.
To order the DIY Kit please go to https://stampingwithjoni.wordpress.com/diykits/ by Sunday at midnight (or by Friday at 10 am for the early shipment).
To see the video please go to https://www.youtube.com/live/vmwkUMFE1AQ?feature=share.
Happy Crafting!
With inky fingers,
Joni 🙂
