
It’s Tutorial Thursday! Today I want to show you how to create wobbler and slider cards.
Here are the photos of the cards.
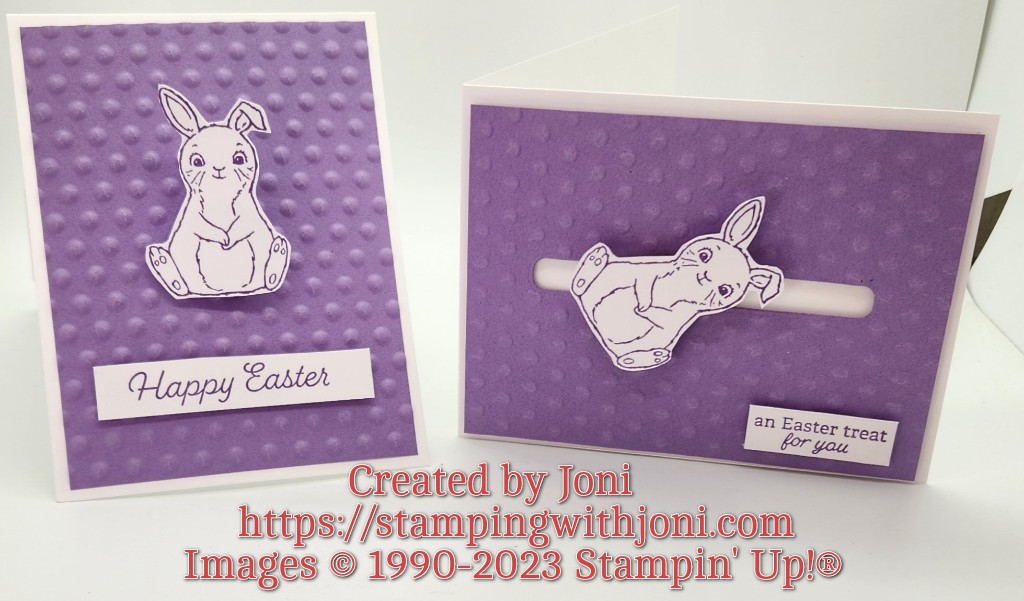
- For both of these cards the base is Thick Basic White Card Stock cut to 4 1/4″ X 11″ with the Paper Trimmer. Then on the 11″ side it is scored at 5 1/2″.
- The mat is Highland Heather Card Stock cut with the Paper Trimmer to 5 1/4″ X 4″. It is then embossed with one of the Basic 3D Embossing Folders from the Online Exclusives.
- For the Wobbler Card two 1″ circles are punched out from the Highland Heather Card Stock and have a hole punched in the middle with the Take Your Pick Tool. About 5″ of wire is wound around the tool and then thread through the hole and secured with Tear & Tape Adhesive on both sides. Stamp the bunny and sentiment with Highland Heather Ink on a scrap piece of Basic White Card Stock. Cut out with Snips. Attach the bunny to one circle and then then other circle to the base of the card. Then attach your sentiment with Dimensionals.
- For the Slider Card cut a “window” with the coordinating die from the Cracker & Treat Box Dies. The window is about one and a half lengths of the die. Then take two pennies and sandwich a Dimensional between the window to create a track. Tip: Cut the points off the Dimensional first. Then stamp a bunny and sentiment with Highland Heather Ink on a scrap of Basic White Card Stock and cut out. Attach the bunny to the penny with either Mini Glue Dots or a Dimensional. Then attach the sentiment with Dimensionals.
For how to put it together please reference the video at https://www.youtube.com/live/AkxKeNRGa70?feature=share.
To order the DIY Kit please go to https://stampingwithjoni.wordpress.com/diykits/.
Happy Crafting!
With inky fingers,
Joni 🙂
