
It’s Tutorial Thursday! Today I will give you instructions, measurements, and a video to make this.
You will need:
- Flirty Flamingo Card Stock
- Peaceful Poppies Designer Series Paper
- Whisper White Card Stock
- Best Dressed 6X6 Designer Series Paper
- Rich Razzleberry Card Stock
- Basic Black Card Stock
- Gold Foil Sheet
- Snail Adhesive
- Mini Glue Dots
- Dimensionals
- Die Cutting Machine
- Poppy Moments Dies
- Detailed Bee Dies
- Cello Bag
- Tissue Paper
- Pirouette Cookies
- Real Red 3/8″ Double Stitched Satin Ribbon
- Leaf Ribbon
Directions:
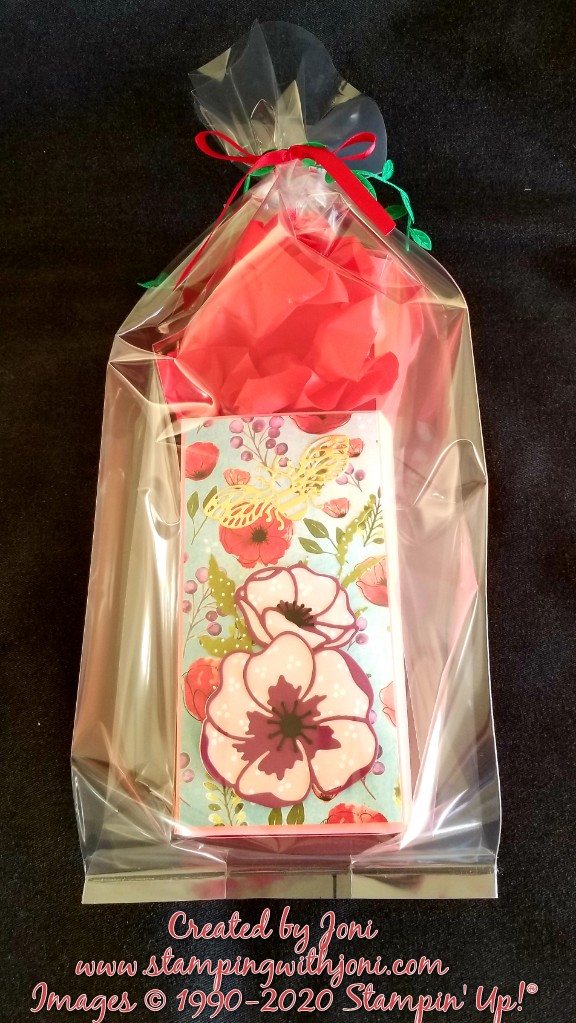
- Take Flirty Flamingo Card Stock and on 11″ side score at 2″, 5 1/4″, 7 1/4″, and 10 1/2″. On 8 1/2″ side score at 6 1/4″. Cut up short side on scores to create tabs. Trim off of tabbed side about 1/4″ to 1/2″ inch so tabs don’t overlap. Take Tear and Tape to seal box.
- Cut Whisper White Card Stock and Peaceful Poppies Designer Series Paper at 6 1/8″ X 3 1/8″ to create mat for front and back of bag.
- Cut out poppy background, detail of flower, leaves, and bee. Attach with Snail Adhesive and centers of flowers with Glue Dots. Attach poppies to bag with Dimensionals.
- Fill with cookies and tissue paper.
- Wrap in cello bag with ribbon.
For a look at how to create this please reference the video below.
Happy Crafting!
With inky fingers,
Joni 🙂
