
It’s Tutorial Thursday! Today we are creating two cards, not just one.
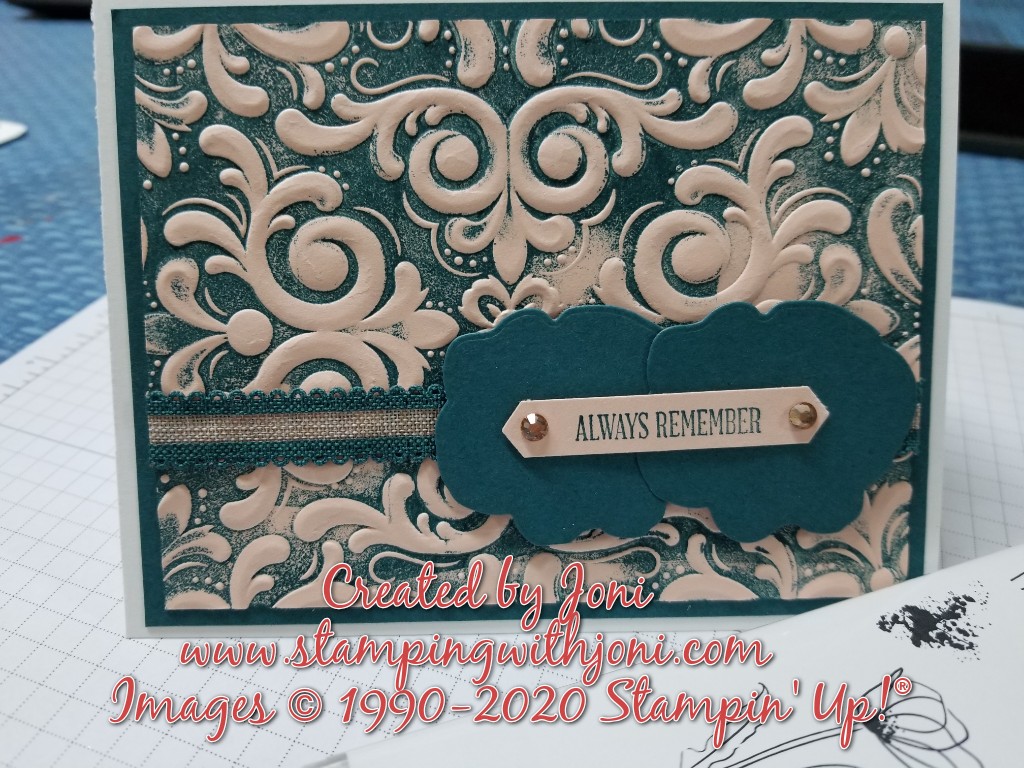
Here are the instructions for the top card that has the Parisian Flourish 3D Embossing Folder for a background.
- Cut Thick Whisper White Card Stock to 5 1/2″ X 8 1/2″. Score on the 8 1/2″ side at 4 1/4″.
- Attach Pretty Peacock mat cut to 5 1/4″ X 4″ with Snail Adhesive to the card base.
- Take Petal Pink mat cut to 5″ X 3 3/4″ and Parisian Fourish 3D Embossing Folder. Stamp Pretty Peacock Ink directly to embossing folder. Set mat on inked side of the folder and run through Die Cutting Machine.
- Take Pretty Peacock 1/2″ Scalloped Linen Ribbon and Glue Dots to adhere to mat.
- Stamp sentiment from Peaceful Moments Stamp Set in Pretty Peacock Ink on to Petal Pink scrap of card stock. Punch out with Classic Label Punch.
- Take scrap of Pretty Peacock Card Stock and run the outline of the poppy from the dies twice. This becomes your background for the sentiment.
- Attach Dimensionals to the back of the Posies. Make sure that the Dimensionals are positioned to adhere to the paper and not the ribbon. Attach side by side to create a background.
- Then attach sentiment with Snail Adhesive or Glue Dots.
- Last, but not least, attach Champagne Rhinestones to the sentiment.
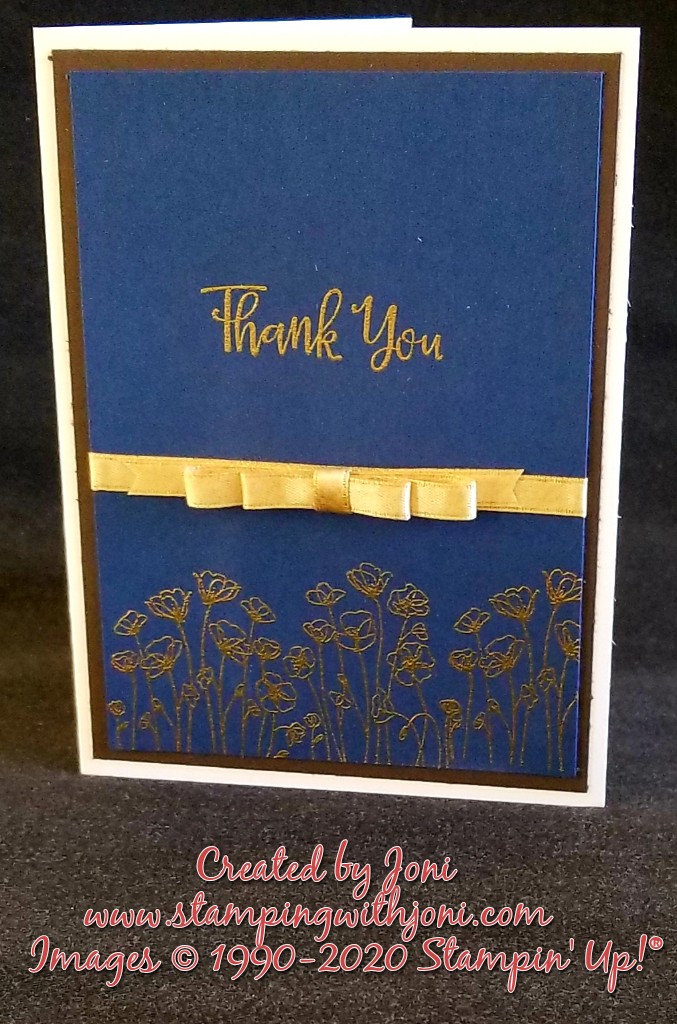
And here are the instructions for the Thank You card.
- Cut Thick Whisper White Card Stock to 5 1/2″ X 8 1/2″. Score on the 8 1/2″ side at 4 1/4″.
- Cut Early Espresso mat to 5 1/4″ X 4″ and adhere to card base with Snail Adhesive.
- Take Night of Navy mat and place on scrap mat or grid paper. Rub the Embossing Buddy over the entire mat. Stamp sentiment and posies in Versamark Ink. Quickly cover with Gold Embossing Powder. Then heat with Heat Tool until all powder melts.
- Cut gold ribbon to about 5″ long. Attach to navy mat with Glue Dots.
- Cut another piece of gold ribbon for bottom of bow. Attach with Glue Dots. Continue to cut strips and create loops for bow by attaching with Glue Dots. Cut a little piece of gold ribbon to go around the middle of the loops to finish the bow. Attach all with Glue Dots.
If you would like to see the full tutorial video please go to https://www.youtube.com/watch?v=aKPyEe4frKk.
Enjoy!
Happy Crafting!
With inky fingers,
Joni 🙂
