
It’s Tutorial Thursday! Today I want to show you how to make this rainbow card with a pot of gold made from a tulip.
Let’s begin with a picture, shall we?
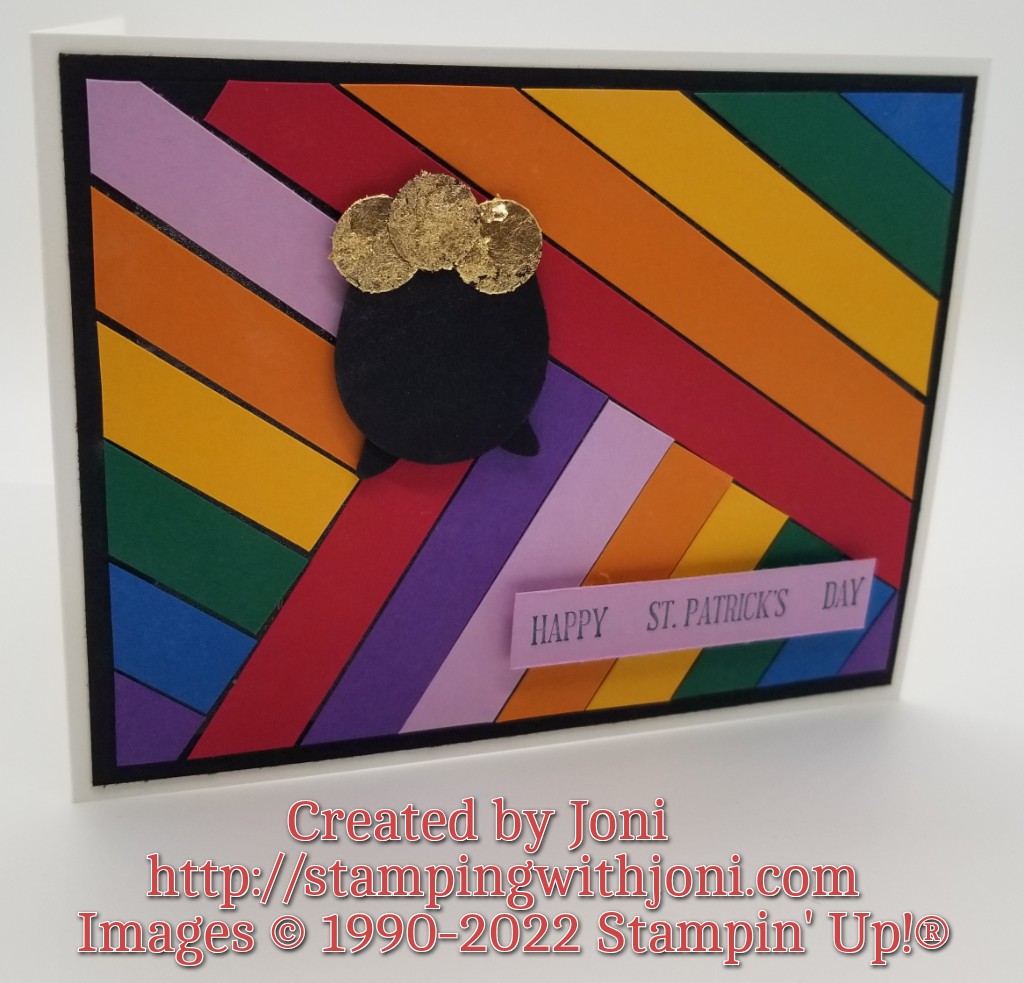
This is what you will need to have on hand and how to prepare it.
- Cut Thick Basic White Card Stock with the Paper Trimmer to 4 1/4″ X 11″. On the 11″ side score at 5 1/2″. This is your card base.
- Cut Basic Black Card Stock with the Paper Trimmer to 4″ X 5 1/4″. This is your outer mat. Attach to card base with Stampin’ Seal.
- Cut another piece of Basic Black Card Stock with the Paper Trimmer to 3 3/4″ X 5″. This is your inner mat and also your anchor sheet for all the strips. Attach Adhesive Sheets to the entire front of this inner mat. This will allow you to easily place the strips on the mat. Peel the adhesive backing off and begin to attach strips.
- Cut strips from the colors of your choice measuring 1/2″ wide. You will need a few pieces that are just a bit longer than your inner mat to go across. Place your main color in a sort of “t”. Then begin attaching all the other colors in whatever pattern you choose. Tip: If you have a bit of sticky left you might want to dust the front with a bit of cornstarch, the embossing buddy (retired now), or a used dryer sheet. This will get rid of any residue from the Adhesive Sheet.
- Punch out a tulip from the Tulip Builder Punch. Cut the top off just where it flairs with Snips. Then cut the middle nub off the “crown”. This will become your base for the pot to sit on. Attach all with Mini Glue Dots. Then attach to inner mat (with all the strips) with either Mini Glue Dots, Stampin’ Seal, or Dimensionals. Tip: If your strips come together and are a bit crooked this might be where your pot goes.
- Take another piece of scratch card stock and cover both sides with Adhesive Sheet. Then punch out circles (1/2″ circle punch used here, now retired). Peel the front sticker backing off and brush the Gilded Leafing on. Repeat until covered and with all coins. Peel the backing off and then place on pot.
- Take a leftover strip of color and stamp your sentiment. Attach on inner mat with Dimensionals.
To view the video please go to https://youtu.be/hT9PolC40Fs.
Happy Crafting!
With inky fingers,
Joni 🙂
