
It’s Tutorial Thursday! Today I want to show you how to heat, dry, and partial emboss. It will all be done on this one card.
- For the card base you will need a piece of Thick Basic White Card Stock cut with the Paper Trimmer to 4 1/4″ X 11″. On the 11″ side score at 5 1/2″.
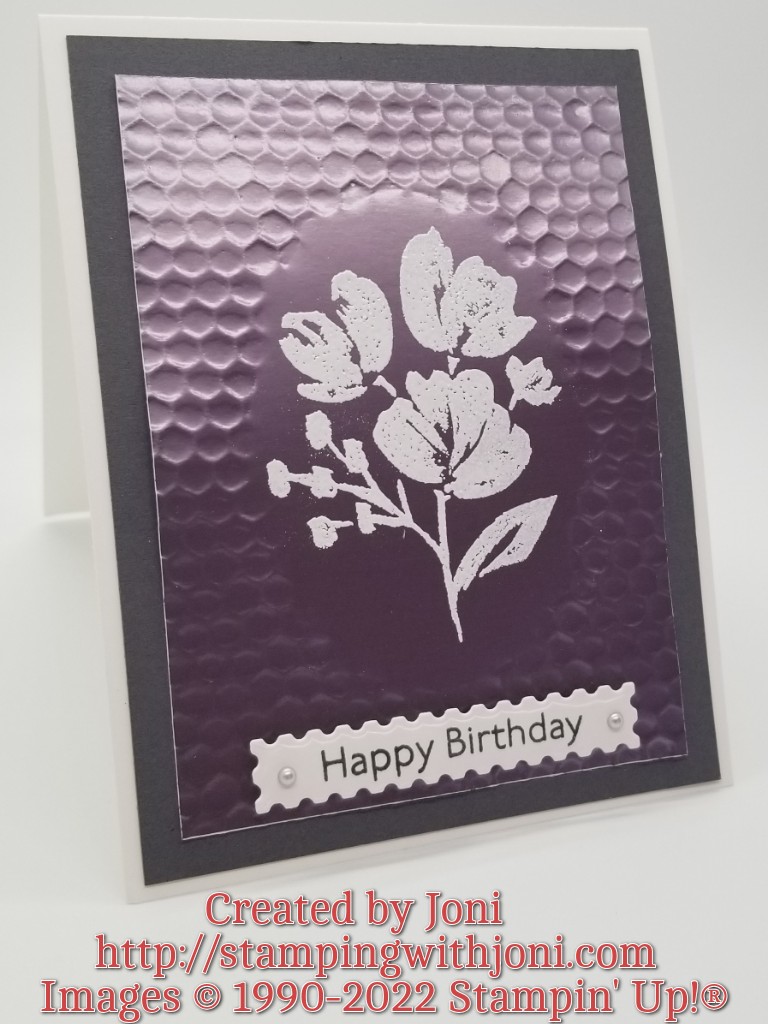
- The outer mat is from Basic Gray Card Stock with the Paper Trimmer to 4″ X 5 1/4″. Attach with Stampin’ Seal.
- The inner mat or accent piece is Silver Foil from the 12″ X 12″ Specialty Pack and is cut with the Paper Trimmer to 3 3/4″ X 5″.
- Before embossing the inner mat grab a piece of thin chipboard and cut out whatever die or shape you would like. You will need to take the adapter plate (#2) off and use card stock shims instead. I ran mine through about 4 times before it cut through. I then use this piece in the embossing folder as a way to get only a partial image. (Please refer to the video below.)
- After embossing with the folder, then I stamped the flower from the Art Gallery Photopolymer Stamp Set with Versamark Ink. Sprinkle heavily with White Emboss Powder and heat with the Heat Tool. Attach to the outer mat with Stampin’ Seal.
- Take a scrap piece of Basic White Card Stock and stamp the sentiment in Basic Gray Ink. Then cut out with the Floral Gallery Die. Attach with Mini Dimensionals and then place Metallic Pearls (silver).
To watch the video please go to https://youtu.be/-JF7EQ33RHk.
Happy Crafting!
With inky fingers,
Joni 🙂
